Roofs play a key role in protecting building occupants and interiors from outside weather conditions, primarily moisture. The roof, insulation and ventilation must all work together to keep the building free from moisture. Roofs also provide protection from the sun. In fact, if designed correctly, roof overhangs can protect the building’s exterior walls from moisture and sun. The concerns regarding moisture, standing water, durability and appearance are different, reflected in the choices of roofing materials.
Maintaining Your Roof
Homeowner maintenance includes cleaning the leaves and debris from the roof’s valleys and gutters. Debris in the valleys can cause water to wick under the shingles and cause damage to the interior of the roof. Clogged rain gutters can cause water to flow back under the shingles on the eaves and cause damage, regardless of the roofing material. including composition shingle, wood shake, tile or metal. The best way to preserve your roof is to stay off it. Also, seasonal changes in the weather are usually the most destructive forces.
A leaky roof can damage ceilings, walls and furnishings. To protect buildings and their contents from water damage, roofers repair and install roofs made of tar or asphalt and gravel; rubber or thermoplastic; metal; or shingles made of asphalt, slate, fiberglass, wood, tile, or other material. Roofers also may waterproof foundation walls and floors.
There are two types of roofs:  flat and pitched (sloped). Most commercial, industrial and apartment buildings have flat or slightly sloping roofs. Most houses have pitched roofs. Some roofers work on both types; others specialize. Most flat roofs are covered with several layers of materials. Roofers first put a layer of insulation on the roof deck. Over the insulation, they then spread a coat of molten bitumen, a tar-like substance. Next, they install partially overlapping layers of roofing felt, a fabric saturated in bitumen, over the surface. Roofers use a mop to spread hot bitumen over the surface and under the next layer. This seals the seams and makes the surface watertight. Roofers repeat these steps to build up the desired number of layers, called plies. The top layer either is glazed to make a smooth finish or has gravel embedded in the hot bitumen to create a rough surface. An increasing number of flat roofs are covered with a single-ply membrane of waterproof rubber or thermoplastic compounds. Roofers roll these sheets over the roof’s insulation and seal the seams. Adhesive mechanical fasteners, or stone ballast hold the sheets in place. The building must be of sufficient strength to hold the ballast.
Most residential roofs are covered with shingles. To apply shingles, roofers first lay, cut, and tack 3-foot strips of roofing felt lengthwise over the entire roof. Then, starting from the bottom edge, they staple or nail overlapping rows of shingles to the roof. Workers measure and cut the felt and shingles to fit intersecting roof surfaces and to fit around vent pipes and chimneys. Wherever two roof surfaces intersect, or where shingles reach a vent pipe or chimney, roofers cement or nail flashing strips of metal or shingle over the joints to make them watertight. Finally, roofers cover exposed nailheads with roofing cement or caulking to prevent water leakage. Roofers who use tile, metal shingles or shakes follow a similar process. Some roofers also water-proof and damp-proof masonry and concrete walls and floors. To prepare surfaces for waterproofing, they hammer and chisel away rough spots, or remove them with a rubbing brick, before applying a coat of liquid waterproofing compound. They also may paint or spray surfaces with a waterproofing material, or attach a waterproofing membrane to surfaces. When damp-proofing, they usually spray a bitumen-based coating on interior or exterior surfaces.
A number of roofing materials are available…
Asphalt
Asphalt is the most commonly used roofing material. Asphalt products include shingles, roll-roofing, built-up roofing, and modified bitumen membranes. Asphalt shingles are typically the most common and economical choice for residential roofing. They come in a variety of colors, shapes and textures. There are four different types: strip, laminated, interlocking, and large individual shingles. Laminated shingles consist of more than one layer of tabs to provide extra thickness. Interlocking shingles are used to provide greater wind resistance. And large individual shingles generally come in rectangular and hexagonal shapes. Roll-roofing products are generally used in residential applications, mostly for underlayments and flashings. They come in four different types of material: smooth-surfaced, saturated felt, specialty-eaves flashings, and mineral-surfaced. Only mineral-surfaced is used alone as a primary roof covering for small buildings, such as sheds. Smooth-surfaced products are used primarily as flashing to seal the roof at intersections and protrusions, and for providing extra deck protection at the roof’s eaves and valleys. Saturated felt is used as an underlayment between the roof deck and the roofing material. Specialty-eaves flashings are typically used in climates where ice dams and water backups are common. Built-up roofing (or BUR) is the most popular choice of roofing used on commercial, industrial and institutional buildings. BUR is used on flat and low-sloped roofs and consists of multiple layers of bitumen and ply sheets. Components of a BUR system include the roof deck, a vapor retarder, insulation, membrane, and surfacing material. A modified bitumen-membrane assembly consists of continuous plies of saturated felts, coated felts, fabrics or mats between which alternate layers of bitumen are applied, either surfaced or unsurfaced. Factory surfacing, if applied, includes mineral granules, slag, aluminum or copper. The bitumen determines the membrane’s physical characteristics and provides primary waterproofing protection, while the reinforcement adds strength, puncture-resistance and overall system integrity.

Metal

Most metal roofing products consist of steel or aluminum, although some consist of copper and other metals. Steel is invariably galvanized by the application of a zinc or a zinc-aluminum coating, which greatly reduces the rate of corrosion. Metal roofing is available as traditional seam and batten, tiles, shingles and shakes. Products also come in a variety of styles and colors. Metal roofs with solid sheathing control noise from rain, hail and bad weather just as well as any other roofing material. Metal roofing can also help eliminate ice damming at the eaves. And in wildfire-prone areas, metal roofing helps protect buildings from fire, should burning embers land on the roof. Metal roofing costs more than asphalt, but it typically lasts two to three times longer than asphalt and wood shingles.

Wood

Wood shakes offer a natural look with a lot of character. Because of variations in color, width, thickness, and cut of the wood, no two shake roofs will ever look the same. Wood offers some energy benefits, too. It helps to insulate the attic, and it allows the house to breathe, circulating air through the small openings under the felt rows on which wooden shingles are laid. A wood shake roof, however, demands proper maintenance and repair, or it will not last as long as other products. Mold, rot and insects can become a problem. The life-cycle cost of a shake roof may be high, and old shakes can’t be recycled. Most wood shakes are unrated by fire safety codes. Many use wipe or spray-on fire retardants, which offer less protection and are only effective for a few years. Some pressure-treated shakes are impregnated with fire retardant and meet national fire safety standards. Installing wood shakes is more complicated than roofing with composite shingles, and the quality of the finished roof depends on the experience of the contractor, as well as the caliber of the shakes used. The best shakes come from the heartwood of large, old cedar trees, which are difficult to find. Some contractors maintain that shakes made from the outer wood of smaller cedars, the usual source today, are less uniform, more subject to twisting and warping, and don’t last as long.

Concrete and Tile

Concrete tiles are made of extruded concrete that is colored. Traditional roofing tiles are made from clay. Concrete and clay tile roofing systems are durable, aesthetically appealing, and low in maintenance. They also provide energy savings and are environmentally friendly. Although material and installation costs are higher for concrete and clay tile roofs, when evaluated on a price-versus-performance basis, they may out-perform other roofing materials. Tile adorns the roofs of many historic buildings, as well as modern structures. In fact, because of its extreme durability, longevity and safety, roof tile is the most prevalent roofing material in the world. Tested over centuries, roof tile can successfully withstand the most extreme weather conditions including hail, high wind, earthquakes, scorching heat, and harsh freeze-thaw cycles. Concrete and clay roof tiles also have unconditional Class A fire ratings, which means that, when installed according to building code, roof tile is non-combustible and maintains that quality throughout its lifetime. In recent years, manufacturers have developed new water-shedding techniques and, for high-wind situations, new adhesives and mechanical fasteners. Because the ultimate longevity of a tile roof also depends on the quality of the sub-roof, roof tile manufacturers are also working to improve flashings and other aspects of the underlayment system. Under normal circumstances, properly installed tile roofs are virtually maintenance-free. Unlike other roofing materials, roof tiles actually become stronger over time. Because of roof tile’s superior quality and minimal maintenance requirements, most roof tile manufacturers offer warranties that range from 50 years to the lifetime of the structure.

Concrete and clay tile roofing systems are also energy-efficient, helping to maintain livable interior temperatures (in both cold and warm climates) at a lower cost than other roofing systems. Because of the thermal capacity of roof tiles and the ventilated air space that their placement on the roof surface creates, a tile roof can lower air-conditioning costs in hotter climates, and produce more constant temperatures in colder regions, which reduces potential ice accumulation. Tile roofing systems are made from naturally occurring materials and can be easily recycled into new tiles or other useful products. They are produced without the use of chemical preservatives, and do not deplete limited natural resources.

Single-Ply

Single-ply membranes are flexible sheets of compounded synthetic materials that are manufactured in a factory. There are three types of membranes: thermosets, thermoplastics, and modified bitumens. These materials provide strength, flexibility, and long-lasting durability. The advantages of pre-fabricated sheets are the consistency of the product quality, the versatility in their attachment methods, and, therefore, their broader applicability. They are inherently flexible, used in a variety of attachment systems, and compounded for long-lasting durability and watertight integrity for years of roof life. Thermoset membranes are compounded from rubber polymers. The most commonly used polymer is EPDM (often referred to as “rubber roofing”). Thermoset membranes make successful roofing materials because they can withstand the potentially damaging effects of sunlight and most common chemicals generally found on roofs. The easiest way to identify a thermoset membrane is by its seams, which require the use of adhesive, either liquid or tape, to form a watertight seal at the overlaps. Thermoplastic membranes are based on plastic polymers. The most common thermoplastic is PVC (polyvinyl chloride) which has been made flexible through the inclusion of certain ingredients called plasticizers. Thermoplastic membranes are identified by seams that are formed using either heat or chemical welding. These seams are as strong or stronger than the membrane itself. Most thermoplastic membranes are manufactured to include a reinforcement layer, usually polyester or fiberglass, which provides increased strength and dimensional stability. Modified bitumen membranes are hybrids that incorporate the high-tech formulation and pre-fabrication advantages of single-ply with some of the traditional installation techniques used in built-up roofing. These materials are factory-fabricated layers of asphalt, “modified” using a rubber or plastic ingredient for increased flexibility, and combined with reinforcement for added strength and stability. There are two primary modifiers used today: APP (atactic polypropylene) and SBS (styrene butadiene styrene). The type of modifier used may determine the method of sheet installation. Some are mopped down using hot asphalt, and some use torches to melt the asphalt so that it flows onto the substrate. The seams are sealed by the same technique.

Are You at Risk?

If you aren’t sure whether your house is at risk from natural disasters, check with your local fire marshal, building official, city engineer, or planning and zoning administrator. They can tell you whether you are in a hazard area. Also, they usually can tell you how to protect yourself and your house and property from damage. It is never a bad idea to ask an InterNACHI inspector whether your roof is in need of repair during your next scheduled inspection. Protection can involve a variety of changes to your house and property which that can vary in complexity and cost. You may be able to make some types of changes yourself. But complicated or large-scale changes and those that affect the structure of your house or its electrical wiring and plumbing should be carried out only by a professional contractor licensed to work in your state, county or city. One example is fire protection, accomplished by replacing flammable roofing materials with fire-resistant materials. This is something that most homeowners would probably hire a contractor to do.

Replacing Your Roofdraw home inspection pic

The age of your roof is usually the major factor in determining when to replace it. Most roofs last many years, if properly installed, and often can be repaired rather than replaced. An isolated leak usually can be repaired. The average life expectancy of a typical residential roof is 15 to 20 years. Water damage to a home’s interior or overhangs is commonly caused by leaks from a single weathered portion of the roof, poorly installed flashing, or from around chimneys and skylights. These problems do not necessarily mean you need a new roof.

Fire-Resistant Materials

Some roofing materials, including asphalt shingles, and especially wood shakes, are less resistant to fire than others. When wildfires and brush fires spread to houses, it is often because burning branches, leaves, and other debris buoyed by the heated air and carried by the wind fall onto roofs. If the roof of your house is covered with wood or asphalt shingles, you should consider replacing them with fire-resistant materials. You can replace your existing roofing materials with slate, terra cotta or other types of tile, or standing-seam metal roofing. Replacing roofing materials is difficult and dangerous work. Unless you are skilled in roofing and have all the necessary tools and equipment, you will probably want to hire a roofing contractor to do the work. Also, a roofing contractor can advise you on the relative advantages and disadvantages of various fire-resistant roofing materials.
Hiring a Licensed Contractor
One of the best ways to select a roofing contractor is to ask friends and relatives for recommendations. You may also contact a professional roofers association for referrals. Professional associations have stringent guidelines for their members to follow. The roofers association in your area will provide you with a list of available contractors. Follow these guidlines when selecting a contractor:
  • get three references and review their past work;
  • get at least three bids;
  • get a written contract, and don’t sign anything until you completely understand the terms;
  • pay 10% down or $1,000 whichever is less;
  • don’t let payments get ahead of the work;
  • don’t pay cash;
  • don’t make final payment until you’re satisfied with the job; and
  • don’t rush into repairs or be pressured into making an immediate decision.
You’ve Chosen the Contractor… What About the Contract?
Make sure everything is in writing. The contract is one of the best ways to prevent problems before you begin. The contract protects you and the contractor by including everything you have both agreed upon. Get all promises in writing and spell out exactly what the contractor will and will not do.
…and Permits?
Your contract should call for all work to be performed in accordance with all applicable building codes. The building codes set minimum safety standards for construction. Generally, a building permit is required whenever structural work is involved. The contractor should obtain all necessary building permits. If this is not specified in the contract, you may be held legally responsible for failure to obtain the required permits. The building department will inspect your roof when the project has reached a certain stage, and again when the roof is completed.
and Insurance?
Make sure the contractor carries workers’ compensation insurance and general liability insurance in case of accidents on the job. Ask to have copies of these policies for your job file. You should protect yourself from mechanics’ liens against your home in the event the contractor does not pay subcontractors or material suppliers. You may be able to protect yourself by having a “release of lien” clause in your contract. A release of lien clause requires the contractor, subcontractors and suppliers to furnish a “certificate of waiver of lien.” If you are financing your project, the bank or lending institution may require that the contractor, subcontractors and suppliers verify that they have been paid before releasing funds for subsequent phases of the project.
Keep these points in mind if you plan to have your existing roofing materials replaced:
  • Tile, metal, and slate are more expensive roofing materials, but if you need to replace your roofing anyway, it may be worthwhile to pay a little more for the added protection these materials provide.
  • Slate and tile can be much heavier than asphalt shingles or wood shingles. If you are considering switching to one of these heavier coverings, your roofing contractor should determine whether the framing of your roof is strong enough to support them.
  • If you live in an area where snow loads are a problem, consider switching to a modern standing-seam metal roof, which will usually shed snow efficiently.
by Nick Gromicko, CMI® and Kenton Shepard

Influenced by the changes in the economic and legal environments over the past 30 years, home inspection reports have changed to accommodate increased consumer expectations, and to provide more extensive information and protection to both inspectors and their clients.

Development of Standards
Prior to the mid-1970s, inspection reports followed no standard guidelines and, for the most part, there was little or no oversight or licensure. As might be imagined, without minimum standards to follow, the quality of inspection reports varied widely, and the home inspection industry was viewed with some suspicion.
With the founding of the American Society of Home Inspectors (ASHI) in 1976, home inspection guidelines governing inspection report content became available in the form of a Standards of Practice. Over time, a second, larger trade association, the International Association of Certified Home Inspectors (InterNACHI), came into existence, and developed its own standards.
InterNACHI has grown to dominate the inspection industry and, in addition to its Residential Standards of Practice, it has developed a comprehensive Standards of Practice for the Inspection of Commercial Properties.  Today, most types of inspections from mold to fire door inspections are performed in accordance with one of InterNACHI’s Standards of Practice.
As a consumer, you should take the time to examine the Standards of Practice followed by your inspector. If he is unaffiliated with any professional inspection organization, and his reports follow no particular standards, find another inspector.
Generally speaking, reports should describe the major home systems, their crucial components, and their operability, especially the ones in which failure can result in dangerous or expensive-to-correct conditions. Defects should be adequately described, and the report should include recommendations.
Reports should also disclaim portions of the home not inspected. Since home inspections are visual inspections, the parts of the home hidden behind floor, wall and ceiling coverings should be disclaimed.
Home inspectors are not experts in every system of the home, but are trained to recognize conditions that require a specialist inspection.
Home inspections are not technically exhaustive, so the inspector will not disassemble a furnace to examine the heat exchanger closely, for example.
Standards of Practice are designed to identify both the requirements of a home inspection and the limitations of an inspection.
Checklist and Narrative Reports
In the early years of the home inspection industry, home inspection reports consisted of a simple checklist, or a one- or two-page narrative report.
Checklist reports are just that; very little is actually written. The report is a series of boxes with short descriptions after them. Descriptions are often abbreviated, and might consist of only two or three words, such as “peeling paint.” The entire checklist might only be four or five pages long. Today, some inspection legal agreements are almost that long!
Because of the lack of detailed information, checklist reports leave a lot open to interpretation, so that buyers, sellers, agents, contractors, attorneys and judges may each interpret the information differently, depending on their motives.
In the inspection business, phrases that describe conditions found during an inspection are called “narratives.”  Narrative reports use reporting language that more completely describes each condition. Descriptions are not abbreviated.
Both checklist and narrative reports are still in use today, although many jurisdictions are now beginning to ban checklist reports because the limited information they offer has resulted in legal problems.
From the standpoint of liability, narrative reports are widely considered safer, since they provide more information and state it more clearly.
Many liability issues and problems with the inspection process are due to misunderstandings about what was to be included in the report, or about what the report says.
For example, in 2002, an investor bought a 14-unit hotel in California.  The six-page narrative report mentioned that flashing where the second-story concrete walkway met the building was improperly installed, and the condition could result in wood decay. Four years later, the investor paid out almost $100,000 to demolish and replace the entire upper walkway. In some places, it was possible to push a pencil through support beams.

Although the inspector’s report had mentioned the problem, it hadn’t made clear the seriousness of the condition, or the possible consequences of ignoring it. Today, a six-page report would be considered short for a small house.

Development of Reporting Software

Years ago, when computers were expensive to buy and difficult to operate, inspection reports were written by hand. As computers became simpler to operate and more affordable, inspection software began to appear on the market.

Today, using this software, an inspector can chose from a large number of organized boilerplate narratives that s/he can edit or add to in order to accommodate local conditions, since inspectors in a hot, humid city like Tampa Bay, Florida, are likely to find types of problems different from those found by inspectors in a cold, dry climate, like Salt Lake City, Utah.

Using narrative software and checking boxes in categories that represent the home systems, an inspector can produce a very detailed report in a relatively short time.

For example, using a checklist report, an inspector finding a number of inoperable lights in a home would check a box in the “INTERIOR” section labeled something like “some lights inoperable,” and that would be the limit of the information passed on to the client.

Using inspection software, in the “INTERIOR” section of the program, an inspector might check a box labeled “some lights inoperable.”  This would cause the following narrative to appear in the “INTERIOR” section of the inspection report:

“Some light fixtures in the home appeared to be inoperable. The bulbs may be burned out, or a problem may exist with the fixtures, wiring or switches.
If after the bulbs are replaced, these lights still fail to respond to the switch, this condition may represent a potential fire hazard, and the Inspector recommends that an evaluation and any necessary repairs be performed by a qualified electrical contractor.”

Standard disclaimers and other information can be pre-checked to automatically appear in each report.

Narrative Content

Narratives typically consists of three parts:

  1. a description of a condition of concern;
  2. a sentence or paragraph describing how serious the condition is, and the potential ramifications, answering questions such as, “Is it now stable, or will the problem continue?” or “Will it burn down the house?” and “When?”; and
  3. a recommendation. Recommendations may be for specific actions to be taken, or for further evaluation, but they should address problems in such a way that the reader of the report will understand how to proceed.

“Typically” is a key word here. Some narratives may simply give the ampacity of the main electrical disconnect. There is no need for more than one sentence. Different inspectors would include what they think is necessary.

Report Content

Inspection reports often begin with an informational section which gives general information about the home, such as the client’s name, the square footage, and the year the home was built.

Other information often listed outside the main body of the report, either near the beginning or near the end, are disclaimers, and sometimes a copy of the inspection agreement, and sometimes a copy of the Standards of Practice.  A page showing the inspector’s professional credentials, designations, affiliations and memberships is also often included.  And it is a good idea to include InterNACHI’s Now That You’ve Had a Home Inspection book.

Inspection reports often include a summary report listing major problems to ensure that important issues are not missed by the reader. It’s important that the reader be aware of safety issues or conditions which will be expensive to correct. With this in mind, some inspectors color-code report narratives, although many feel that color-coding exposes them to increased liability and don’t do this.

Software often gives inspectors the choice of including photographs in the main body of the report, near the narrative that describes them, or photographs may be grouped together toward the beginning or end of the report.

A table of contents is usually provided.

The main body of the report may be broken down into sections according to home systems, such as “ELECTRICAL,” “PLUMBING,” “HEATING,” etc., or it may be broken down by area of the home:  “EXTERIOR,” “INTERIOR,” “KITCHEN,” “BEDROOMS,” etc.

It often depends on how the inspector likes to work.

Sample Reports

Many inspectors have websites which include sample inspection reports for prospective clients to view. Take the time to look at them. Also often included is a page explaining the scope of the inspection. The inspection contract is usually included on the website, and it should give you a good idea of what will be included in the report.

In conclusion, for consumers to have realistic expectations about what information will be included in the home inspection report, follow these tips:

  • read the Standards of Practice;
  • read the Contract;
  • view a sample Inspection Report; and
  • talk with the inspector.

https://www.nachi.org/home-inspection-reports.htm

Red Horse Home Inspection is proud to service the Black Hills of  SD.  We service Rapid City, Black Hawk, Piedmont, Sturgis, Whitewood, Belle Fourche, Spearfish, Custer, Deadwood, Lead, Hot Springs, Keystone, Hills City, Hermosa, Box Elder, Wall, and surrounding areas.  Schedule your inspection with us today.

Follow us on Facebook and Instagram.

3 mistakes home buyers should avoid.  When it comes time to buy a home here are 3 mistakes home buyers should avoid.

Mistake #1: Thinking you can’t afford it.

Many people who thought that buying the home they wanted was simply out of their reach are now enjoying a new lifestyle in their very own homes.Buying a home is the smartest financial decision you will ever make. In fact, most homeowners would be broke at retirement if it wasn’t for one saving grace — the equity in their homes. Furthermore, tax allowances favor home ownership.

Real estate values have always risen steadily. Of course, there are peaks and valleys, but the long-term trend is a consistent increase. This means that every month when you make a mortgage payment, the amount that you owe on the home goes down and the value typically increases. This “owe less, worth more” situation is called equity build-up and is the reason you can’t afford not to buy.

Even if you have little money for a down payment or credit problems, chances are that you can still buy that new home. It just comes down to knowing the right strategies, and working with the right people. See below.

  certified professional inspector

Mistake #2: Not hiring a buyer’s agent to represent you.

Buying property is a complex and stressful task. In fact, it is often the biggest, single investment you will make in your lifetime. At the same time, real estate transactions have become increasingly complicated. New technology, laws, procedures, and competition from other buyers require buyer agents to perform at an ever-increasing level of competence and professionalism. In addition, making the wrong decisions can end up costing you thousands of dollars. It doesn’t have to be this way!

Work with a buyer’s agent who has a keen understanding of the real estate business and the local market. A buyer’s agent has a fiduciary duty to you. That means that he or she is loyal only to you and is obligated to look out for your best interests. A buyer’s agent can help you find the best home, the best lender, and the best home inspector in your area. That inspector should be an InterNACHI-certified home inspector because InterNACHI inspectors are the most qualified and best-trained inspectors in the world.

Trying to buy a home without an agent or a qualified inspector is, well… unthinkable.

Mistake #3: Getting a cheap inspection.
Buying a home is probably the most expensive purchase you will ever make. This is no time to shop for a cheap inspection. The cost of a home inspection is small relative to the value of the home being inspected. The additional cost of hiring a certified inspector is almost insignificant by comparison. As a home buyer, you have recently been crunching the numbers, negotiating offers, adding up closing costs, shopping for mortgages, and trying to get the best deals. Don’t stop now! Don’t let your real estate agent, a “patty-cake” inspector, or anyone else talk you into skimping here.

InterNACHI front-ends its membership requirements. InterNACHI turns down more than half the inspectors who want to join because they can’t fulfill the membership requirements.

InterNACHI-certified inspectors perform the best inspections, by far.  InterNACHI-certified inspectors earn their fees many times over.  They do more, they deserve more and — yes — they generally charge a little more.  Do yourself a favor…and pay a little more for the quality inspection you deserve. This article is from InterNACHI and can be found at https://www.nachi.org/3.htm.

Red Horse Home Inspection is proud to service the Black Hills of South Dakota including Rapid City, Black Hawk, Piedmont, Sturgis, Whitewood, Belle Fourche, Spearfish, Deadwood, Lead, Custer, Hot Springs, Hill City, Keystone, Hermosa, Box Elder, and surrounding area.  Schedule you home inspection today.
Follow us on Facebook and Instagram.

Electricity is an essential part of our lives. However, it has the potential to cause great harm. Electrical systems will function almost indefinitely, if properly installed and not overloaded or physically abused. Electrical fires in our homes claim the lives of 485 Americans each year and injure 2,305 more. Some of these fires are caused by electrical system failures and appliance defects, but many more are caused by the misuse and poor maintenance of electrical appliances, incorrectly installed wiring, and overloaded circuits and extension cords.

Some safety tips to remember:
  • Never use anything but the proper fuse to protect a circuit. 
  • Find and correct overloaded circuits.
  • Never place extension cords under rugs.
  • Outlets near water should be GFCI-type outlets.
  • Don’t allow trees near power lines to be climbed.
  • Keep ladders, kites, equipment and anything else away from overhead power lines.
Electrical Panels
Electricity enters the home through a control panel and a main switch where one can shut off all the power in an emergency. These panels are usually located in the basement. Control panels use either fuses or circuit breakers. Install the correct fuses for the panel. Never use a higher-numbered fuse or a metallic item, such as a penny. If fuses are used and there is a stoppage in power, look for the broken metal strip in the top of a blown fuse. Replace the fuse with a new one marked with the correct amperage. Reset circuit breakers from “off” to “on.” Be sure to investigate why the fuse or circuit blew. Possible causes include frayed wires, overloaded outlets, or defective appliances. Never overload a circuit with high-wattage appliances. Check the wattage on appliance labels. If there is frayed insulation or a broken wire, a dangerous short circuit may result and cause a fire. If power stoppages continue or if a frayed or broken wire is found, contact an electrician.
Outlets and Extension Cords
Make sure all electrical receptacles or outlets are three-hole, grounded outlets. If there is water in the area, there should be a GFCI or ground-fault circuit interrupter outlet. All outdoor outlets should be GFCIs. There should be ample electrical capacity to run equipment without tripping circuit breakers or blowing fuses. Minimize extension cord use. Never place them under rugs. Use extension cords sparingly and check them periodically. Use the proper electrical cord for the job, and put safety plugs in unused outlets.

Electrical Appliances

Appliances need to be treated with respect and care. They need room to breathe. Avoid enclosing them in a cabinet without proper openings, and do not store papers around them. Level appliances so they do not tip. Washers and dryers should be checked often. Their movement can put undue stress on electrical connections. If any appliance or device gives off a tingling shock, turn it off, unplug it, and have a qualified person correct the problem. Shocks can be fatal. Never insert metal objects into appliances without unplugging them. Check appliances periodically to spot worn or cracked insulation, loose terminals, corroded wires, defective parts and any other components that might not work correctly. Replace these appliances or have them repaired by a person qualified to do so.
Electrical Heating Equipment
Portable electrical heating equipment may be used in the home as a supplement to the home heating system. Caution must be taken when using these heating supplements. Keep them away from combustibles, and make sure they cannot be tipped over. Keep electrical heating equipment in good working condition. Do not use them in bathrooms because of the risk of contact with water and electrocution. Many people use electric blankets in their homes. They will work well if they are kept in good condition. Look for cracks and breaks in the wiring, plugs and connectors. Look for charred spots on both sides. Many things can cause electric blankets to overheat. They include other bedding placed on top of them, pets sleeping on top of them, and putting things on top of the blanket when it is in use. Folding the blankets can also bend the coils and cause overheating.
Children
Electricity is important to the workings of the home, but can be dangerous, especially to children. Electrical safety needs to be taught to children early on. Safety plugs should be inserted in unused outlets when toddlers are in the home. Make sure all outlets in the home have face plates. Teach children not to put things into electrical outlets and not to chew on electrical cords. Keep electrical wiring boxes locked. Do not allow children to come in contact with power lines outside. Never allow them to climb trees near power lines, utility poles or high tension towers.
Electricity and Water
A body can act like a lightning rod and carry the current to the ground. People are good conductors of electricity, particularly when standing in water or on a damp floor. Never use any electrical appliance in the tub or shower. Never touch an electric cord or appliance with wet hands. Do not use electrical appliances in damp areas or while standing on damp floors. In areas where water is present, use outlets with GFCIs. Shocks can be fatal.
Animal Hazards
Mice and other rodents can chew on electrical wires and damage them. If rodents are suspected or known to be in the home, be aware of the damage they may cause, and take measures to get rid of them.
Outside Hazards
There are several electrical hazards outside the home. Be aware of overhead and underground power lines. People have been electrocuted when an object they are moving has come in contact with the overhead power lines. Keep ladders, antennae, kites and poles away from power lines leading to the house and other buildings. Do not plant trees, shrubs or bushes under power lines or near underground power lines. Never build a swimming pool or other structure under the power line leading to your house. Before digging, learn the location of underground power lines.
Do not climb power poles or transmission towers. Never let anyone shoot or throw stones at insulators. If you have an animal trapped in a tree or on the roof near electric lines, phone your utility company. Do not take a chance of electrocuting yourself. Be aware of weather conditions when installing and working with electrical appliances. Never use electrical power tools or appliances with rain overhead or water underfoot. Use only outdoor lights, fixtures and extension cords. Plug into outlets with a GFCI. Downed power lines are extremely dangerous. If you see a downed power line, call the electric company, and warn others to stay away. If a power line hits your car while you are in it, stay inside unless the car catches fire. If the car catches fire, jump clear without touching metal and the ground at the same time.
MORE SAFETY PRECAUTIONS :
  • Routinely check your electrical appliances and wiring.
  • Hire an InterNACHI inspector. InterNACHI inspectors must pass rigorous safety training and are knowledgeable in the ways to reduce the likelihood of electrocution.
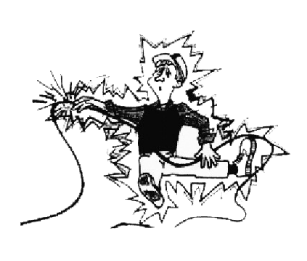
  • Frayed wires can cause fires. Replace all worn, old and damaged appliance cords immediately.
  • Use electrical extension cords wisely and don’t overload them.
  • Keep electrical appliances away from wet floors and counters; pay special care to electrical appliances in the bathroom and kitchen.
  • Don’t allow children to play with or around electrical appliances, such as space heaters, irons and hair dryers.
  • Keep clothes, curtains and other potentially combustible items at least 3 feet from all heaters.
  • If an appliance has a three-prong plug, use it only in a three-slot outlet. Never force it to fit into a two-slot outlet or extension cord.
  • Never overload extension cords or wall sockets. Immediately shut off, then professionally replace, light switches that are hot to the touch, as well as lights that flicker. Use safety closures to childproof electrical outlets.
  • Check your electrical tools regularly for signs of wear. If the cords are frayed or cracked, replace them. Replace any tool if it causes even small electrical shocks, overheats, shorts out or gives off smoke or sparks.
In summary, household electrocution can be prevented by following the tips offered in this guide and by hiring an InterNACHI inspector.https://www.nachi.org/electric.htm
Red Horse Home Inspection in proud to service the Black Hills of South Dakota including Rapid City, Black Hawk, Piedmont, Sturgis, Spearfish, Deadwood, Lead, Custer, Hot Springs, Keystone, Hill City, Hermosa, Box Elder, and surrounding areas.  Schedule your home inspection with us today.
Follow us on Facebook and Instagram .

Buying a home? It’s probably the most expensive purchase you’ll ever make. This is no time to shop for a cheap home inspection. The cost of a home inspection is very small relative to the value of the home being inspected. The additional cost of hiring an InterNACHI-Certified Professional Inspector® is almost insignificant.  Choosing the right home inspector can be tough with all of your options out there.

Red Horse Home Inspection Logo

You have recently been crunching the numbers, negotiating offers, adding up closing costs, shopping for mortgages, and trying to get the best deals. Don’t stop now. Don’t let your real estate agent, a “patty-cake” inspector, or anyone else talk you into skimping here.  InterNACHI-certified inspectors  perform the best inspections by far. 

InterNACHI-certified inspectors earn their fees many times over. They do more, they deserve more, and — yes — they generally charge a little more. Do yourself a favor… and pay a little more for the quality inspection you deserve.

The licensing of home inspectors only sets a minimum standard. Much like being up to code, any less would be illegal.  Imaginary people, children, psychics (who claim to “sense” if a house is OK) and even pets can theoretically be home inspectors.  InterNACHI, the International Association of Certified Home Inspectors, front-ends its membership requirements.

InterNACHI inspectors:

  • have to pass InterNACHI’s Online Inspector Examination, and re-take and pass it every three years (it’s free and open to everyone, and free to re-take);
  • have to complete InterNACHI’s online Code of Ethics Course (free to take after joining, and self-paced);
  • have to take InterNACHI’s online Standards of Practice Course (free to take after joining, and self-paced);
  • must submit a signed Membership Affidavit;
  • substantially adhere to InterNACHI’s Standards of Practice;
  • abide by InterNACHI’s Code of Ethics;
  • have to submit four mock inspection reports to InterNACHI’s Report Review Committee (for free) before performing their first paid home inspection for a client if the candidate has never performed a fee-paid home inspection previously;
  • within the first year of membership, have to successfully pass the following free online, accredited, and self-paced courses and exams:
    • InterNACHI’s “Safe Practices for the Home Inspector” course,
    • InterNACHI’s “25 Standards Every Inspector Should Know” course,
    • InterNACHI’s “Residential Plumbing Overview for Inspectors” course,
    • InterNACHI’s “How to Perform Residential Electrical Inspections” course,
    • InterNACHI’s “How to Perform Roof Inspections” course,
    • InterNACHI’s “How to Inspect HVAC Systems” course,
    • InterNACHI’s “Structural Issues for Home Inspectors” course,
    • InterNACHI’s “How to Perform Exterior Inspections” course,
    • InterNACHI’s “How to Inspect the Attic, Insulation, Ventilation and Interior” course,
    • InterNACHI’s “How to Perform Deck Inspections” course,
    • InterNACHI’s “How to Inspect for Moisture Intrusion” course, and
    • InterNACHI’s “How to Inspect Fireplaces, Stoves, and Chimneys” course.
  • have to pursue inspection-related training by taking 24 hours of additional accredited Continuing Education each year;
  • have to maintain their Online Continuing Education Log (free), per InterNACHI’s rigorous Continuing Education policy;
  • have access to InterNACHI’s Message Board for exchanging information and tips with colleagues and experts;
  • have access to InterNACHI’s “What’s New” section so that they can keep up with the latest news and events in the inspection industry;
  • have access to InterNACHI’s time-tested Inspection Agreement, which keeps them (and you) away from lawsuits;
  • have access to InterNACHI’s Report Review/Mentoring Service;
  • have to carry E&O Insurance (if their state requires it);
  • have access to a real estate agent Hold-Harmless Clause;
  • and have access to many other benefits, training, marketing tools and information to help themselves, as well as consumers and real estate professionals, provided for free by the world’s largest inspector association.
So, the next time you need a home inspector (or need to refer your clients to one), make sure that inspector is a member of InterNACHI.  https://www.nachi.org/blindc.htm
Red Horse Home Inspection is proud to service the Black Hills of South Dakota including Rapid City, Sturgis, Piedmont, Black Hawk, Spearfish, Lead, Deadwood, Custer, Hot Springs, Hill City, Keystone, Hermosa, Box Elder, and surrounding areas.  Schedule your home inspection today.
Follow us on Facebook and Instagram.

Eventually, your buyers are going to conduct an inspection. You may as well know what they are going to find by getting a pre-listing inspection. As the seller it is a good idea to get a pre-listing inspection performed ahead of time.  This helps in many ways, such as:

  • It allows you to see your home through the eyes of a critical and neutral third party.
  • It alerts you to immediate safety issues before agents and visitors tour your home.
  • It may alert you to items of immediate concern, such as radon gas or active termite infestation.
  • It permits you to make repairs ahead of time so that …
  • Defects won’t become negotiating stumbling blocks later.
  • There is no delay in obtaining the Use and Occupancy Permit.
  • You have the time to get reasonably priced contractors or make the repairs yourself, if qualified.
  • It helps you to price your home realistically.
  • It may relieve prospects’ concerns and suspicions.
  • It may encourage the buyer to waive his inspection contingency.
  • It reduces your liability by adding professional supporting documentation to your disclosure statement.

Never hire an inspector who is not a member of InterNACHI, which provides the most trusted and rigorous training for inspectors in the industry.

Copies of the inspection report, along with receipts for any repairs, should be made available to potential buyers.  This article is from InterNACHI and can be found at https://www.nachi.org/sellersinspection.htm
Check Red Horse Home Inspection LLC out on Facebook and Instagram.

Buying a home?

 So what really matters in a home inspection?  The process can be stressful.  A home inspection is supposed to give you peace of mind but, depending on the findings, it may have the opposite effect. You will be asked to absorb a lot of information over a short period of time.  Your inspection will entail a written report, including checklists and photos, and what the inspector tells you during the inspection. All of this combined with the seller’s disclosure and what you notice yourself can make the experience overwhelming. What should you do?  Here is what matters in a home inspection.
Relax.
Home inspectors are professionals, and if yours is a member of InterNACHI, then you can trust that he is among the most highly trained in the industry. Most of your inspection will be related to maintenance recommendations and minor imperfections. These are good to know about.

However, the issues that really matter will fall into four categories:

  1. major defects, such as a structural failure;
  2. conditions that can lead to major defects, such as a roof leak;
  3. issues that may hinder your ability to finance, legally occupy, or insure the home if not rectified immediately; and
  4. safety hazards, such as an exposed, live buss bar at the electrical panel.

Anything in these categories should be addressed as soon as possible. Often, a serious problem can be corrected inexpensively to protect both life and property (especially in categories 2 and 4).

Most sellers are honest and are often surprised to learn of defects uncovered during an inspection. It’s important to realize that a seller is under no obligation to repair everything mentioned in your inspection report. No house is perfect. Keep things in perspective.
And remember that homeownership is both a joyful experience and an important responsibility, so be sure to call on your InterNACHI Certified Professional Inspector® to help you devise an annual maintenance plan that will keep your family safe and your home in top condition for years to come.
https://www.nachi.org/articles/articles.htm#general
Schedule your home inspection today with Red Horse Home Inspection today.  I am proud to service the Black Hills including Rapid City, Sturgis, Spearfish, Custer, Lead, Deadwood, Hot Springs, Keystone, Hill City, Hermosa, Box Elder and surrounding areas.
Check Red Horse Home Inspection out of Facebook and Instagram at

As a home inspector, we come across a lot of the same issues.  I wanted to share 5 common defects found during a home inspection.  Some of these issues could have been easily prevented with education.  Others can be fixed before they cause damage and cause costly repairs.  Let’s take a look at the 5 common defects found during a home inspection and how to fix or prevent them.

Defect #1:  Foundation Clearance to Grade

The soil around your home’s perimeter should be a minimum of 6″ below brick and 8″ below siding or stucco.  This clearance is there to prevent water from intruding during heavy rain.  It also helps water from splashing up and soaking into the siding.   Sometimes planters or gardens are installed against a homes brick or siding.  This can lead to water infiltration and cause damage to siding, sill plate, rim and floor joist, and drywall.  Make sure the grading slopes away form your home, it should slope 6″ in the first 10′.

Defect #2:  Attic Ventilation

Attics should be ventilated.  This is to guard against moisture build-up and mold formation.  It also extends the life of the roof covering.  Many times exhaust fans are not vented to the exterior of the home like they should be and are vented into the attic.  This adds moisture to the attic and can lead to a mold issue.  Proper attic ventilation can help prevent ice dams, too.  The best ventilation would be continuous ridge and soffit vents.

Defect #3:  Gutter and Downspout Placement

Gutters and downspouts carry water from the roof away from the foundation.  Downspouts should not drain onto lower roofs.  This can damage the roof and void manufacture’s warranty.   They should drain into a lower gutter or drain at least 6′ away from the home’s foundation.  These two tips will keep your basement dry and prevent damage to your roof.


Defect #4:  Structure Damaged Caused by Plumbing

Some times joist, studs, and foundations can be damaged when pipes are ran for plumbing. Lack of planning can lead to the home’s structure being modified without engineers approval.  Most of the times these issues can’t be seen, that is why a phase inspection is recommended during the construction.

Defect #5:  Lack of GFCI

Over the years the requirement for GFCI’s in your home have changed.  Most homes are not up to the current safety standards.  GFCI’s are required in garages, bathrooms, kitchens, exterior receptacles, swimming pools, wet bar, crawlspaces, and laundry areas.  If your home’s electrical system has not been updated with GFCI’s, we highly recommend it.

Schedule your home inspection today.

http://instagram.com/redhorsehomeinspectionllc

http://facebook.com/homeinspectoroftheblackhills


At Red Horse Home Inspection LLC, we have five goals for every home we inspect.  Our first goal is to identify major defects that could lead to costly repairs for the home buyer.  No one wants to pay out for costly repairs after moving in to their new home.  Our second goal is to give the home buyer an overall condition of the home.  This could include identifying any deferred maintenance issues, pointing out issues that could lead to future problems.  The third goal is to identify safety issues. This could include pointing out trip and fall hazards around the property, identifying unsafe decks and guardrails and informing you of electrical issues that could be dangerous.  The forth goal is to educate our clients about their new home.  We make sure that you know where the main water and gas shutoffs are located.  Let you know what type of energy is used to heat and cool your home.  We will try and answer any questions you have about your home the day of the inspection or you can call us anytime and we will be happy to answer any questions you have.  Our final goal is you let you know the age of all your major components.  This includes water heaters, central heating and cooling system, refrigerator, and oven.  With every inspection we give our clients a home maintenance book which includes a life expectancy chart for almost all components of your home.  This will give you an idea on how long your components will last before needing replaced.  Red Horse Home Inspection is proud to service Rapid City, Sturgis, Spearfish, Deadwood, Lead, Custer, Hot Springs, Keystone, Hill City, Hermosa, Summerset, Box Elder and surrounding areas.  If you are ready to schedule you home inspection please call 605-490-2916 or schedule online.

Check us out on Facebook and Instagram!


by Nick Gromicko, CMI® and Kenton Shepard
This article is about attached garage fire hazards and the purpose of this article is two fold. First, at InterNACHI, we’d like you to take measures to keep your attached garage free from fire. Fortunately, there are ways these hazards can be reduced, some of which are described below. Secondly, garage fires do happen, and we’d like you to make sure that a fire cannot not easily spread to the rest of your house. While you can perform many of the recommendations in this article yourself, it is a good idea to hire an InterNACHI inspector to make sure your home is safe from attached garage fire.

Why do many garages pose a fire hazard?

  • Where are you most likely to do any welding, or any work on your car? These activities require working with all sorts of flammable materials.
  • Water heaters and boilers are usually stored in garages, and they can create sparks that may ignite fumes or fluids. Car batteries, too, will spark under certain conditions.
  • Oil and gasoline can drip from cars. These fluids may collect unnoticed and eventually ignite, given the proper conditions.
  • Flammable liquids, such as gasoline, motor oil and paint are commonly stored in garages. Some other examples are brake fluid, varnish, paint thinner and lighter fluid.

The following tips can help prevent garage fires and their spread:

  • If the garage allows access to the attic, make sure a hatch covers this access.
  • The walls and ceiling should be fire-rated. Unfortunately, it will be difficult for untrained homeowners to tell if their walls are Type X fire-rated gypsum. An InterNACHI inspector can examine the walls and ceiling to make sure they are adequate fire barriers.
  • The floor should be clear of clutter. Loose papers, matches, oily rags, and other potentially  flammable items are extremely dangerous if they are strewn about the garage floor.
  • Use light bulbs with the proper wattage, and do not overload electrical outlets.
  • Tape down all cords and wires so they are not twisted or accidentally yanked.

If there is a door that connects the garage to the living area, consider the following:

  • Do not install a pet door in the door! Flames can more easily spread into the living area through a pet door, especially if it’s made of plastic.
  • Does the door have a window? An InterNACHI inspector can inspect the window to tell if it’s fire-rated.
  • The door should be self-closing. While it may be inconvenient, especially while carrying groceries into the house from the car, doors should be self-closing. You never know when a fire will happen, and it would be unfortunate to accidentally leave the door open while a fire is starting in the garage.
  • Check the joints and open spaces around the door. Are they tightly sealed? Any openings at all can allow dangerous fumes, such as carbon monoxide or gasoline vapor, to enter the living area. An InterNACHI inspector can recommend ways to seal the door so that fumes cannot enter the living area.

Concerning items placed on the floor, you should check for the following:

  • Store your flammable liquids in clearly labeled, self-closing containers, and only in small amounts. Keep them away from heaters, appliances, pilot lights and other sources of heat or flame.
  • Never store propane tanks indoors. If they catch fire, they can explode. Propane tanks are sturdy enough to be stored outdoors.
In summary, there are plenty of things that you can do to prevent garage fires from spreading to the rest of the house, or to keep them from starting in the first place. However, it is highly recommended that you have your garage periodically examined by an InterNACHI inspector.