More than 2 million decks are built and replaced each year in North America. InterNACHI estimates that of the 45 million existing decks, only 40% are completely safe.
A deck failure is any failure of a deck that could lead to injury, including rail failure, or total deck collapse. There is no international system that tracks deck failures, and each is treated as an isolated event, rather than a systemic problem. Very few municipalities perform investigations into the cause of the failure, and the media are generally more concerned with injuries rather than on the causes of collapses. Rail failure occurs much more frequently than total deck collapses; however, because rail failures are less dramatic than total collapses and normally don’t result in death, injuries from rail failures are rarely reported.
This document does not address specific building codes, balconies, lumber species, grade marks, decks made of plastics or composites, mold, or wood-destroying insects.

The image above depicts an evenly distributed deck load. Building codes require decks to be designed to carry a uniformly distributed load over the entire deck. If evenly distributed, half of the load is carried by the deck-to-house connection, and the other half is carried by the posts.
The image above depicts a typical deck load distribution. People tend to gather near the railings of a deck, and so more load is likely carried by the posts.
Hot tubs filled with water and people are heavy and can weigh a couple of tons. Most decks are designed for loads of 40 to 60 pounds per square foot. Hot tubs require framing that can support over 100 pounds per square foot.
Footings and Posts:
Required footing depths vary based on local building codes. The depth is normally below the frost line, or 12 inches (where frost lines are not applicable).

The above image depicts the 7-Foot Rule. On steep properties, the slope of the ground around the footing could affect the footing’s stability. The 7-Foot Rule states that there should be a least 7 feet between the bottom of a footing and daylight.
Posts in contact with soil should be pressure-treated and oriented so the cut end is above grade.
The image above depicts a free-standing deck (not attached to the home or building). A footing near a home must be on undisturbed soil. Some codes consider soil to be “undisturbed” if it hasn’t been disturbed in more than five years. It may be difficult to find undisturbed soil near the foundation of a new home.
The image above depicts a post base that is not attached to its footing. Posts should be connected to their footings so that the posts don’t lift or slip off.

The image above depicts a pre-cast concrete pier. Posts can lift out of pre-cast concrete piers, and piers can slide. Posts should be connected to their footings so that the posts don’t lift or slip off.

The image above depicts a proper post-to-footing connection. Posts should be connected to their footings so that the posts don’t lift or slip off their footings.
The image above depicts an adjustable post-to-footing connection. Posts should be connected to their footings so that the posts don’t lift or slip off their footings.

The above image depicts a lawn sprinkler keeping a deck post wet. Lawn sprinkler systems that regularly keep the deck wet contribute to decay.
The image above depicts a downspout contributing to post decay. Downspouts should not discharge near deck posts.
The image above depicts the indentation left over from the footing hole, causing a puddle. Puddles contribute to post decay.
Wood can decay and degrade over time with exposure to the elements. Decay is a problem that worsens with time. Members within the deck frame that have decayed may no longer be able to perform the function for which they were installed. Paint can hide decay from an inspector and so should be noted in the report.

The image above depicts a “pick test.” The pick test uses an ice pick, awl or screwdriver to penetrate the wood surface. After penetrating the wood, the tool is leveraged to pry up a splinter, parallel to the grain, away from the surface. The appearance and sound of the action is used to detect decay. The inspector should first try the pick test in an area where the wood is known to be sound to determine a “control” for the rest of the inspection. Decayed wood will break directly over the tool with very few splinters, and less or almost no audible noise compared to sound wood. The pick test cannot detect decay far from the surface of the wood.
The image above depicts a pick test on a deck post. Although deck inspections are visual-only inspections, inspectors may want to dig down around posts and perform pick tests just below grade level to look for decay.

The image above depicts a high deck being supported with 4″x 4″ posts. Tall 4″x 4″ posts twist under load and 4″x 4″ posts, even when treated, decay below grade too quickly. In all but the lowest of decks, deck posts should be at least 6″x 6″, and be no higher than 12 feet; 14 feet is acceptable if cross-bracing is used.
Often, the bottoms of the stringer boards for deck stairs have been found to rest on soil, concrete block or rock, as opposed to resting on posts installed below the frost line. Posts set on soil are subject to rot due to moisture. Posts that are set in unsound footings may cause movement and make the deck above unstable.
Girders and Beams:
The image above depicts the minimum distance of untreated support members from grade. Untreated joists should be at least 18 inches away from the ground. Girders should be 12 inches away from the ground. However, in many situations, exceptions are made where the elevation of the home does not provide for these minimum distances and the climate is very dry.
The image above depicts a girder improperly relying on the sheer strength of lag bolts. Girders should bear directly on posts.
The image above depicts a girder properly resting on a notched post. Girders should bear directly on posts.
The image above depicts a girder properly resting on a post. Girders should bear directly on posts.
Girders supporting joist should not be supported by deck ledgers or band joists.
The image above depicts a butt joint improperly located within a girder span. Butt joints in a girder span are generally not permitted unless specially engineered. Butt joints typically must be located above posts.

The image above depicts notches in a supporting beam. Notches must be less than one-quarter the depth of the member. On the tension and compression faces, the notch depth must be less than one-sixth of the member’s depth, and the notch length must be less than one-third of the member’s depth. Notches are not permitted in the middle third of spans, or on the tension face of members that are greater than 3½ inches thick.The image above depicts a level being used to check for beam sag. Even with a carpenter’s level, it can be difficult to see beam sag from the front.
The image above depicts beam sag being eyed-up. Often it is easier to detect beam sag by eye than with a level by looking along the bottom edge of the beam.
Ledger Connection:
The most common cause of deck collapse is when a ledgers pulls away from the band joists of homes and buildings.
The two most common ways to correctly attach a ledger to a structure are with lag screws or through-bolts. The installation of through-bolts requires access to the back-side of the rim joist which, in some cases, is not possible without significant removal of drywall within the structure.
Most building codes state that, where positive connections to the primary building structure cannot be verified during inspection, decks shall be self-supporting (free-standing).
Determining the exact required spacing for the ledger fasteners is based on many factors, including:
- joist length;
- type of fastener;
- diameter of fastener;
- sheathing thickness;
- use of stacked washers;
- type of wood species;
- moisture content;
- band joist integrity; and
- deck loads…
…and so is beyond the scope of a visual inspection. However, the spacing of ledger fasteners is primarily determined by the length of the joists.
InterNACHI’s ledger fastener spacing formula provides inspectors with a rule-of-thumb:
On-center spacing of ledger fasteners in inches = 100 ÷ joist length in feet.
A deck with substantially fewer ledger fasteners than that recommended by InterNACHI’s formula may be unsafe.

The image above shows the minimum distance of fasteners to the edges and ends of a ledger board. Lag screws or bolts should be staggered vertically, placed at least 2 inches from the bottom or top, and 5 inches from the ends of the ledger board. Some codes permit the lag screws or bolts to be as close as 2 inches from the ends of the ledger board; however, avoiding the very ends of the ledger boards minimizes splitting from load stress.
Through-bolts should be a minimum of ½-inch in diameter, and have washers at the bolt head and nut. Lag screws should also be a minimum of ½-inch in diameter and have washers. Expansion and adhesive anchors should also have washers.
Deck ledgers should be of at least 2’x 8′ pressure-treated wood.
Ledger Board and Band Joist Contact:
The image above depicts washers being used as spacers between the ledger board and band joist, which is incorrect.
In some cases, the ledger board and band joist are intentionally kept separated by a stack of washers on the lag screw or bolts to allow water to run between the two boards. In other cases, there is insulation between the two boards. Even worse is when the siding or exterior finish system was not removed prior to the installation of the ledger board. Situations like this, where the ledger board and band joist are not in direct contact, significantly reduce the strength of the ledger connection to the structure and are not recommended by InterNACHI, unless the two members are sandwiching structural sheathing.
The image above depicts a ledger board and band joist sandwiching the structural sheathing (correct).
All through-bolts should have washers at the bolt head and nut.
The image above depicts a hold-down tension device. The 2007 IRC Supplement requires hold-down tension devices at no less than two locations per deck.
Codes in some areas outright forbid attaching a ledger board to an open-web floor truss.
The image above depicts a ledger board attached to a concrete wall. Caulking rather than flashing is used.
The image above depicts a ledger board attached to hollow masonry. When the ledger is attached to a hollow masonry wall, the cell should be grouted.
The image above depicts a ledger board improperly supported brick veneer. Ledger boards should not be supported by stone or brick veneer.
Ledger boards should not be attached directly (surface-mounted) to stucco or EIFS, either. Stucco and EIFS have to be cut back so that ledger boards can be attached directly to band joists; however, cut-back stucco and EIFS are difficult to flash and weather-proof.
 The image above depicts both over and under ledger board flashing. The ledger board should always be flashed even when the home or building has a protective roof overhang.
Aluminum flashing is commonly available but should not be used. Contact with pressure-treated wood or galvinized fasteners can lead to rapid corrosion of aluminum.
The image above depicts a deck ledger attached to an overhang. Decks should not be attached to overhangs.
The image above depicts proper framing around chimneys or bay windows that are up to 6 feet wide. Framing around chimneys or bay windows that are more than 6 feet wide requires additional posts.

The image above depicts a cantilevered deck.
Joists should be cantilevered no more than one-quarter of the joist length and three times the joist width (nominal depth). Both conditions must be true.The image above depicts a joist cantilever in the front of the deck and girder cantilevers on both sides of deck posts. Joists should be cantilevered no more than one-quarter the joist length and three times the joist width (nominal depth). Girders can be cantilevered over their posts no more than on-quarter the girder length.
There are three ways a joist can be attached to a ledger:
The first is by resting the joist on a ledger strip. The image above depicts a joist properly resting on a 2″x 2″ ledger strip.
The second is by notching over a ledger strip. The image above depicts a notched joist properly resting a 2″x 2″ ledger strip.
The third is by hanging the joists with joist hangers. The image above depicts joists properly attached to a ledger by way of metal joist hangers.
The image above depicts a joist cut too short. Joists may rest on 2″x 2″ ledgers like the one above (or in joist hangers), but joists must be cut long enough to reach the ledger or band joist that is supporting them.
The image above depicts joists that are not fully resting in their joist hangers. Joists should be fully resting in their joist hangers.
Bracing:
The image above depicts a deck with post-to-joist diagonal bracing. Decks greater than 6 feet above grade should have diagonal bracing from posts to girder, and from posts to joists.
The image above depicts a deck with post-to-girder diagonal bracing. Decks greater than 6 feet above grade should have diagonal bracing from posts to girder, and from posts to joists.
Free-standing decks (not supported by the home or building) should have diagonal bracing on all sides.
The image above depicts underside diagonal bracing of a deck. Decks greater than 6 feet above grade that do not have diagonal decking should have diagonal bracing across the bottoms of the joists to keep the deck square. A deck that is not held square could permit the outer posts to lean to the right or left, parallel to the ledger board, and thus twist the ledger away from the home or building.
Cracks:
As wood ages, it is common for cracks to develop. Large cracks (longer than the depth of the member) or excessive cracking overall can weaken deck framing. Toe-nailed connections are always at risk for splitting. Splitting of lumber near connections should be noted by the inspector.
Connectors and Fasteners:
The inspector should note missing connectors or fasteners. All lag screws and bolts should have washers.
The image above depicts a “hammer test.” Depending on how the deck was built, vital connections may have degraded over time due to various factors. Issues such as wobbly railings, loose stairs, and ledgers that appear to be pulling away from the adjacent structure are all causes for concern. The tightness of fasteners should be checked. If it is not possible to reach both sides of a bolt, it may be struck with a hammer. The ring will sound hollow with vibration if the fastener is loose. The ring will sound solid if the connection is tight. The hammer test is subjective, so the inspector should hammer-test bolts that can be confirmed as tight or loose, and compare the sounds of the rings to develop a control.
Corrosion of Connectors and Fasteners:
All screws, bolts and nails should be hot-dipped galvanized, stainless steel, silicon bronze, copper, zinc-coated or corrosion-resistant. Metal connectors and fasteners can corrode over time, especially if a product with insufficient corrosion-resistance was originally installed. Corrosion of a fastener affects both the fastener and the wood. As the fastener corrodes, it causes the wood around it to deteriorate. As the fastener becomes smaller, the void around it becomes larger. Inspectors normally do not remove fasteners to check their quality or size, but if the inspector removes a fastener, s/he should make sure that removal doesn’t result in a safety issue. Fasteners removed should be from areas that have the greatest exposure to weather. Some inspectors carry new fasteners to replace ones they remove at the inspection.
Posts and Rails:

The image above shows a guardrail supported solely by balusters. Guardrails should be supported by posts every 6 feet.
The image above depicts a notched-deck guardrail post attachment. This common notched-type of attachment is permitted by most codes, but could become unsafe, especially as the deck ages. Because of leverage, a 200-pound force pushing the deck’s guardrail outward causes a 1,700-pound force at the upper bolt attaching the post. It is difficult to attach deck guardrail posts in a manner that is strong enough without using deck guardrail post brackets.
The image above depicts a notched-deck guardrail post attachment. This notched-around-decking type of attachment is permitted by most codes, but could become unsafe, especially as the deck ages. Because of leverage, a 200-pound force pushing the deck’s guardrail outward causes a 1,700-pound force at the upper bolt attaching the post. It is difficult to attach deck guardrail posts in a manner that is strong enough without using deck guardrail post brackets.

The image above depicts a deck guardrail post properly attached with brackets. Because of leverage, a 200-pound force pushing the deck’s guardrail outward causes a 1,700-pound force at the upper bolt attaching the post. It is difficult to attach deck guardrail posts in a manner that is strong enough without using deck guardrail post brackets.
The image above depicts a post and balusters cut level and not shedding water. The end-grain of vertical posts and balusters should not be cut level.
The image above depicts a post and balusters properly cut at angles to shed water. The end-grain of vertical posts and balusters should be cut at an angle.
Missing Guardrails:
Decks that are greater than 12 inches above adjacent areas should have guardrails around the edges. Some codes require guardrails only around the edges of decks 30 inches or higher.
Improper Guardrail Height:
Most residential codes require the top of the guardrail to be at least 36 inches from the deck surface. Most commercial code height is 42 inches.
The image above depicts child-unsafe guardrail infill. Infill should not permit a 4-inch sphere to pass through.
The image above depicts horizontal balustrades. Ladder-type guardrail infill on high decks is prohibited by some local codes because they are easy for children to climb over.
Decking:
The image above depicts deck framing near a chimney or bay window. The ends of decking boards near the chimney or bay window can extend unsupported up to 6 inches.
The above image depicts decking that is laid too tight. Decking should have 1/8-inch gaps between boards so that puddles don’t form.

The above image depicts decking that is properly spaced. Decking should have 1/8-inch gaps between boards so that puddles don’t form.
The image above depicts decking that isn’t staggered properly. Decking should be staggered so that butt joints don’t land on the same joist side by side.
The image above depicts decking lengths. Some are too short. Each segment of decking should bear on a minimum of four joists.
Decking should be attached to the floor joists and rim joist, especially in high-wind areas.
Decking Nail Pull-Out:
Inspectors should look for splitting in decking and nail pull-out. Aside from the structural issue, nails that have pulled out or screws that are not driven into the decking fully can cause injury to bare feet.
Stairs:

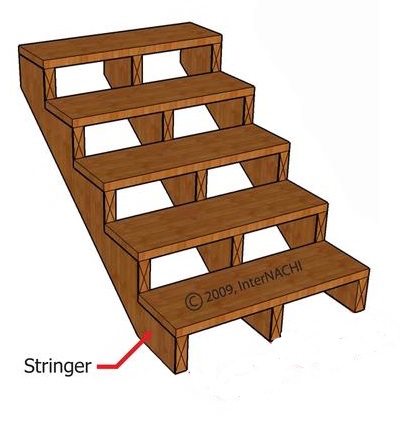
The image above depicts a deck stair stringer. Stair stringers shall be made of 2″x 12″ lumber at a minimum, and no less than 5 inches wide at any point.
The image above depicts deck stair stringers. Stringers should be no more than 36 inches apart.
The image above depicts ledger strips properly located under stair treads. Where solid stringers are used, stair treads should be supported with ledger strips (as depicted), mortised, or supported with metal brackets.
The image above depicts a set of stairs with open risers. Most deck stairs have open risers and are not safe for children. Risers may be open but should not allow the passage of a 4-inch diameter sphere.
The image above depicts stair riser height. To minimize tripping, the maximum variation amongst riser heights (difference between the tallest and shortest risers) should be no more than 3/8-inch.
The bottom step of a stairway leading up to a deck is typically at a different height than the rest of the steps. This can present a trip hazard.
Steps with open risers can present a tripping hazard if a user catches his foot by stepping too far into the tread. To mitigate this hazard, the risers can be closed or the treads can be made deeper.
Deck Lighting:
Decks rarely have light sources that cover the entire stairways. Any unlit stairway is a safety issue.
Stair Handrails:
Stairs with four or more risers should have a handrail on at least one side. According to the International Standards of Practice for Inspecting Commercial Properties, ramps longer than 6 feet should have handrails on both sides.
The image above depicts proper stair handrail height. Handrail height should be between 34 and 38 inches measured vertically from the sloped plane adjoining the tread nosing.
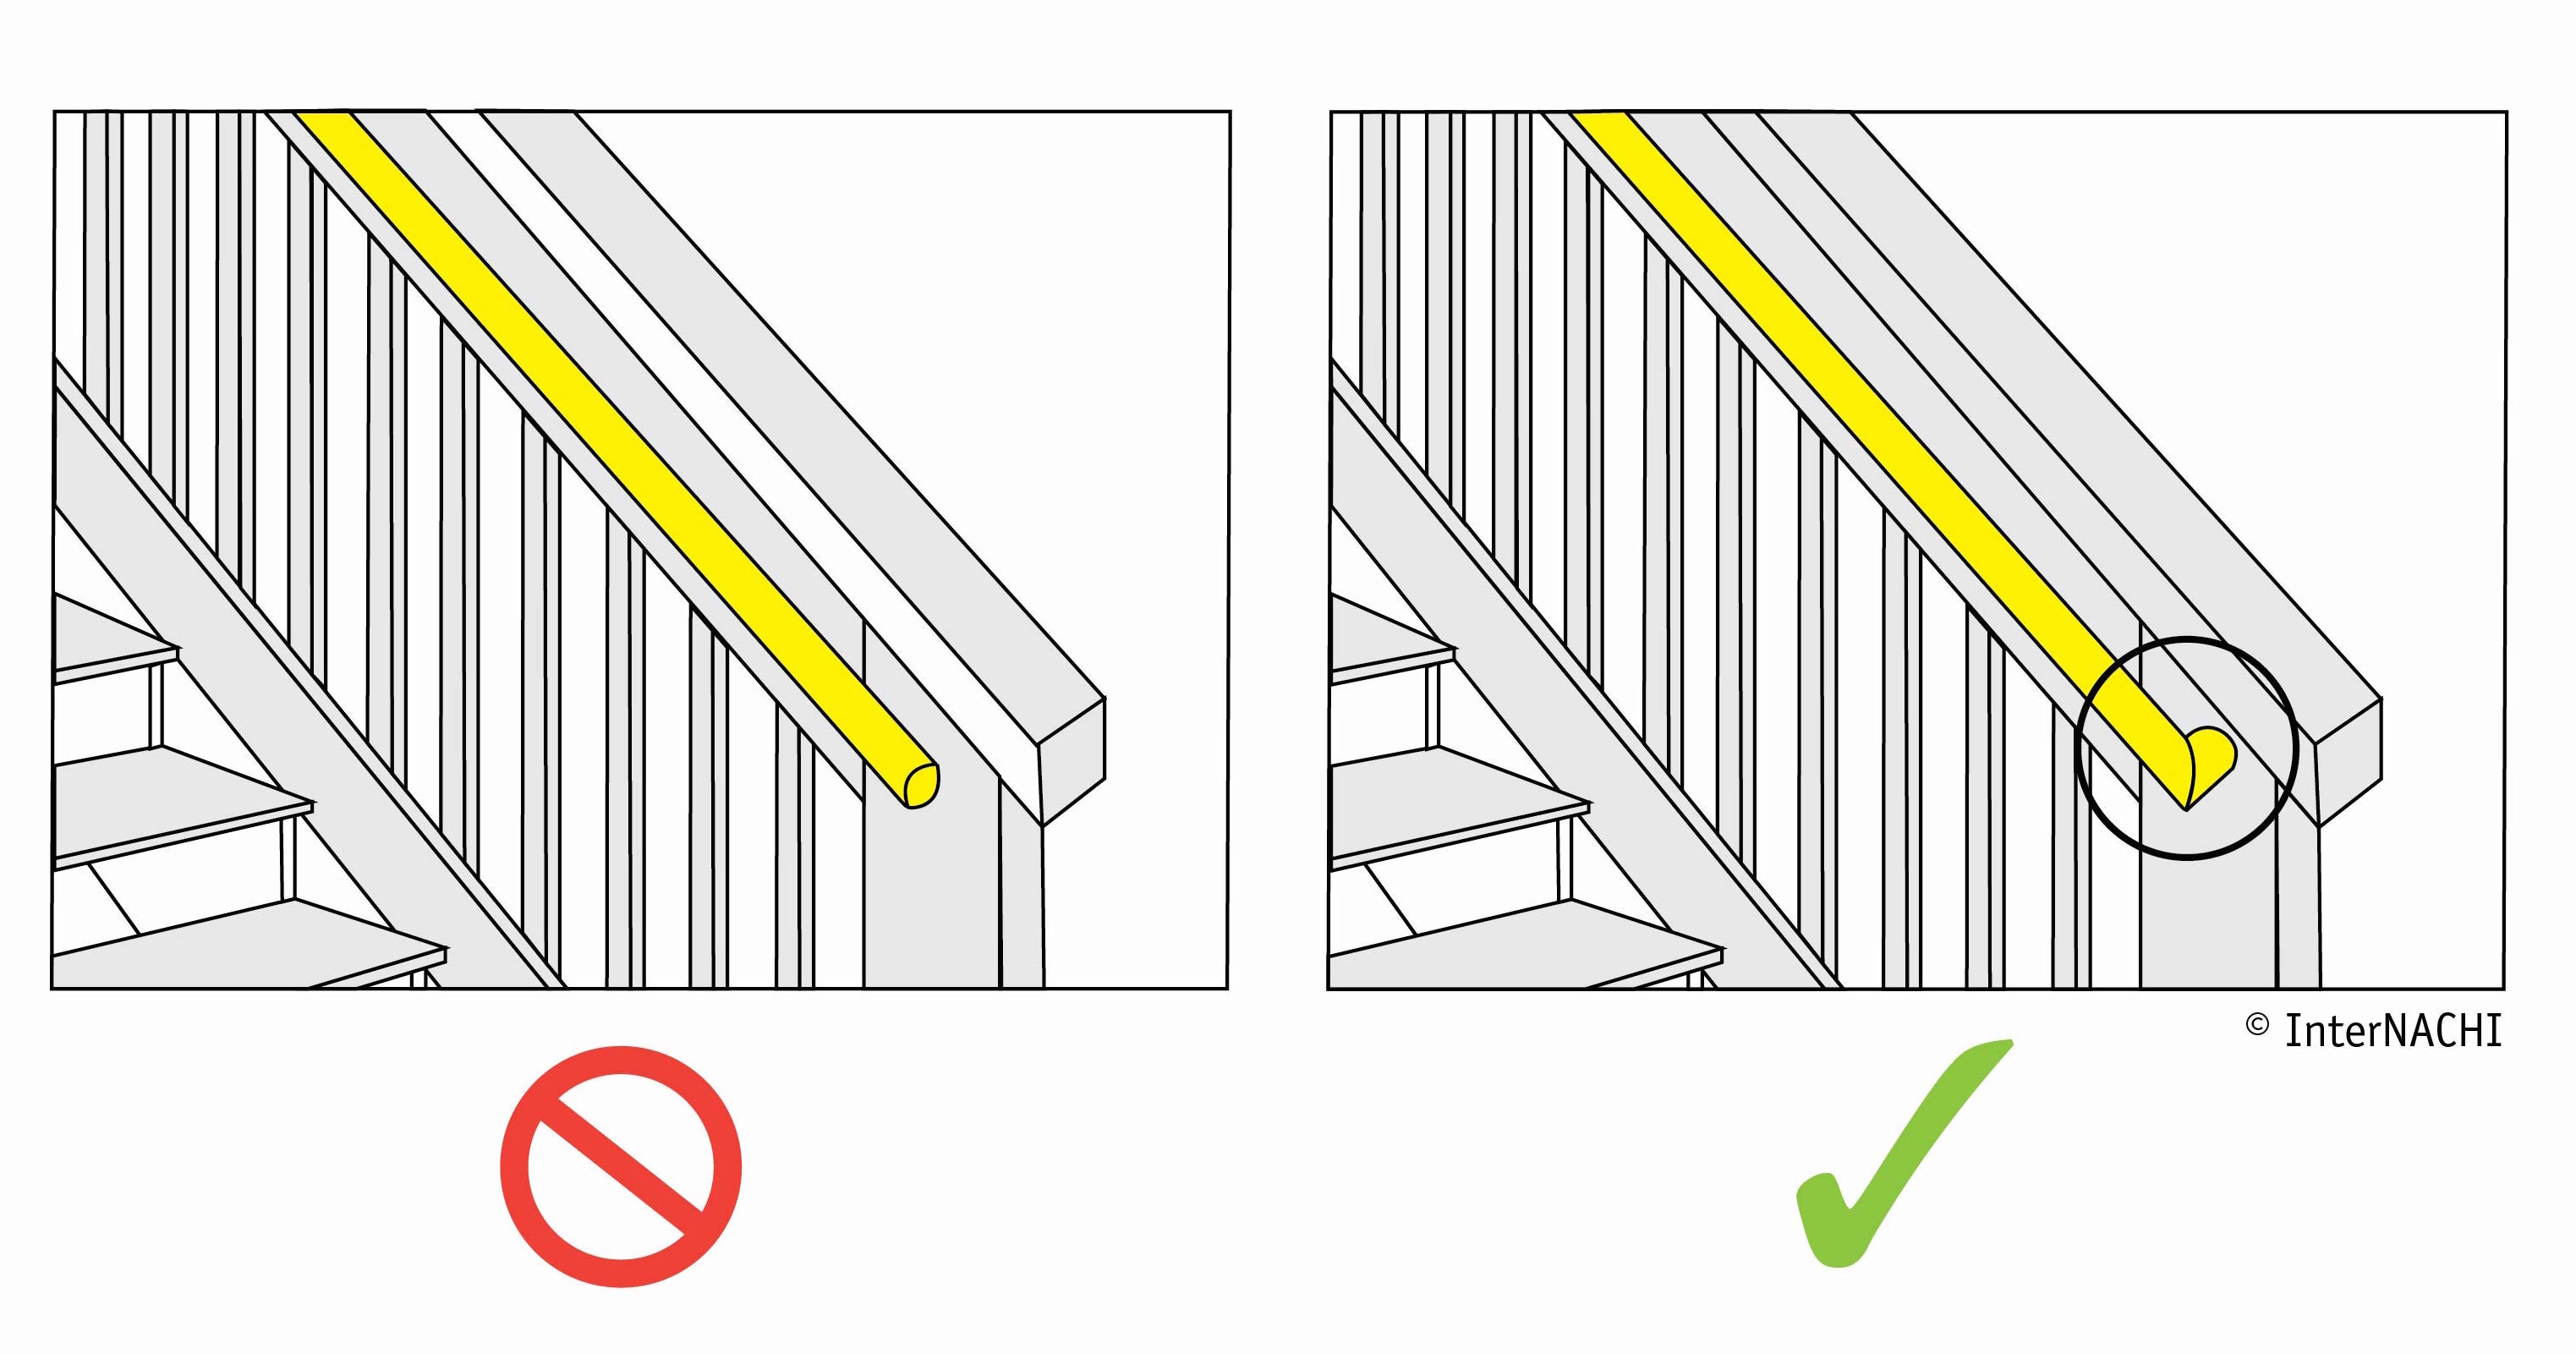
The image above depicts a stair handrail that is not graspable. Many deck handrails improperly consist of 2″x 6″ lumber or decking. Handrails should be graspable, continuous and smooth.
The images above show that handrail ends should be returned or terminate in newel posts.
The next three images depict graspable handrails:

The three images directly above depict graspable handrails. Many deck handrails improperly consist of 2″x 6″ lumber or decking. Handrails should be graspable, continuous and smooth.
The image above depicts the minimum distance between stair handrail posts. Stair handrails should have posts at least every 5 feet.
The image above depicts permitted spacing at stairs. Larger spacing presents a child-safety issue.
Electrical Receptacle:
The image above depicts a deck with an electrical receptacle, but the receptacle does not have a weatherproof cover. As of 2008, the National Electric Code requires at least one receptacle outlet on decks that are 20 square foot or larger.
The image above depicts a weatherproof receptacle cover. The deck receptacle should have a weatherproof cover.
Deck Location:
The image above depicts a deck located above a septic tank access. Decks should not be located where they might obstruct septic tank accesses, underground fuel storage tanks, well heads, or buried power lines.
The image above depicts a deck obstructing a basement bedroom’s emergency egress window. Egress openings under decks and porches are acceptable, provided the escape path is at least 36 inches (914 mm) in height, and the path of egress is not obstructed by infill or lattice.
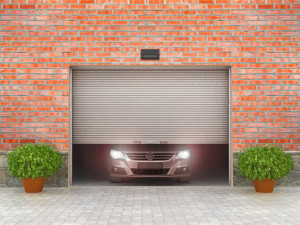 Have you given much thought to your garage door lately? The garage door is the biggest and heaviest moving item in most homes, and more than 20,000 people each year are injured by them. That’s why we wanted to share with you these important safety guidelines that can help keep you and your family safe. Whether you live in a home with multiple garage doors or a condo unit with a detached garage, by following these tips, you’ll be able to keep yourself — and your family — safe when around these massive doors.
 Brrr! Feeling a bit chilly? Space heaters are a popular way to get a bit of extra warmth at home or in the office during the spring, fall and winter months.
 Have a little one in your house? You’ve likely did your fair share of child proofing in every room of your home. Unfortunately, there are a number of hazards in homes today that many parents do not realize pose a safety threat. What should you look out for? Here’s a look at some everyday items that are dangerous to children:
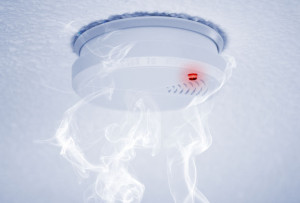
 A new home is definitely a big reason to celebrate. What better way to mark the day than with a thoughtful housewarming gift? If you enjoy giving practical gifts, a fire extinguisher is an incredible choice for a new homeowner. Every homeowner should have one on each floor or area of their home. And many people forget to buy one. Moving into a new home? Put a fire extinguisher on the top of your shopping list.
 Moving into a new home is a happy — and hectic — time. There’s so much to do! Your to-do list is overflowing in the days and weeks after purchasing a home. That’s why we wanted to share with you two tasks that you’ll want to put at the top of your to-do list to help keep you and your family healthy and safe.
 Moving into a new home? If you have children, it’s a great time to make sure your home is safe for the smallest members of your household. Every 30 minutes, a child in the United States is injured as a result of a TV or furniture tip-over incident. Most of those injuries happen at home, involving children younger than 7 years of age.