The Preservation and Repair of Historic Stucco

The term “stucco” is used to describe a type of exterior plaster applied as a two- or three-part coating directly onto masonry, or applied over wood or metal lath to a log or wood frame structure. Stucco is found in many forms on historic structures throughout the United States. It is so common, in fact, that it frequently goes unnoticed, and is often disguised or used to imitate another material. Historic stucco is also sometimes incorrectly viewed as a sacrificial coating, and consequently removed to reveal stone, brick or logs that historically were never intended to be exposed. Age and lack of maintenance hasten the deterioration of many historic stucco buildings. Like most historic building materials, stucco is at the mercy of the elements, and even though it is a protective coating, it is particularly susceptible to water damage. Stucco is a material of deceptive simplicity; in most cases, its repair should not be undertaken by a property owner unfamiliar with the art of plastering. Successful stucco repair requires the skill and experience of a professional plasterer. Although several stucco mixes are representative of different periods, they are provided here for reference.  Each project is unique, with its own set of problems that require individual solutions.

  
Historical Background 


The stucco on the early-19th century Richardson-Owens-Thomas House in Savannah, Georgia, is a type of natural cement.

Stucco has been used since ancient times. Still widely used throughout the world, it is one of the most common of traditional building materials. Up until the late 1800s, stucco, like mortar, was primarily lime-based, but the popularization of Portland cement changed the composition of stucco, as well as mortar, to a harder material. Historically, the term “plaster” has often been interchangeable with “stucco”; the term is still favored by many, particularly when referring to the traditional lime-based coating. By the 19th century “stucco,” although originally denoting fine interior ornamental plasterwork, had gained wide acceptance in the United States to describe exterior plastering. “Render” and “rendering” are also terms used to describe stucco, especially in Great Britain. Other historic treatments and coatings related to stucco, in that they consist (at least in part) of a similarly plastic or malleable material, include: parging and pargeting, wattle and daub, “cob” or chalk mud, pise de terre, rammed earth, briquete entre poteaux or bousillage, half-timbering, and adobe. All of these are regional variations on traditional mixtures of mud, clay, lime, chalk, cement, gravel or straw. Many are still used today.


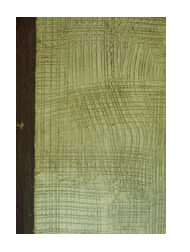
The stucco finish on Arlington House, Arlington, Virginia, was marbleized in the 1

Revival Styles Promote the Use of Stucco

The introduction of the many revival styles of architecture around the turn of the 20th century, combined with the improvement and increased availability of Portland cement, resulted in a craze for stucco as a building material in the United States. Beginning about 1890 and gaining momentum into the 1930s and 1940s, stucco was associated with certain historic architectural styles, including: Prairie; Art Deco and Art Moderne; Spanish Colonial, Mission, Pueblo, Mediterranean, English Cotswold Cottage, and Tudor Revival styles; as well as the ubiquitous bungalow and four-square house. The fad for Spanish Colonial Revival, and other variations on this theme, was especially important in furthering stucco as a building material in the United States during this period, since stucco clearly looked like adobe.

Although stucco buildings were especially prevalent in California, the Southwest and Florida, ostensibly because of their Spanish heritage, this period also spawned stucco-coated, revival-style buildings all over the United States and Canada. The popularity of stucco as a cheap and readily available material meant that, by the 1920s, it was used for an increasing variety of building types. Resort hotels, apartment buildings, private mansions and movie theaters, railroad stations, and even gas stations and tourist courts took advantage of the “romance” of period styles, and adopted the stucco construction that had become synonymous with these styles.


The damage to this stucco appears to be caused by moisture infiltration.

A Practical Building Material

Stucco has traditionally been popular for a variety of reasons. It was an inexpensive material that could simulate finely dressed stonework, especially when scored or lined, in the European tradition. A stucco coating over a less finished and less costly substrate, such as rubblestone, fieldstone, brick, log or wood frame, gave the building the appearance of being a more expensive and important structure. As a weather-repellent coating, stucco protects the building from wind and rain penetration, and also offers a certain amount of fire protection. While stucco was usually applied during construction as part of the building design, particularly over rubblestone or fieldstone, in some instances, it was added later to protect the structure, or when a rise in the owner’s social status demanded a comparable rise in his standard of living.

Composition of Historic Stucco

Before the mid-to late 19th century, stucco consisted primarily of hydrated or slaked lime, water and sand, with straw or animal hair mixed in as a binder. Natural cements were frequently used in stucco mixes after their discovery in the United States during the 1820s. Portland cement was first manufactured in the United States in 1871, and it gradually replaced natural cement. After about 1900, most stucco was composed primarily of Portland cement, mixed with some lime. With the addition of Portland cement, stucco became even more versatile and durable. No longer used just as a coating for a substantial material like masonry or log, stucco could now be applied over wood or metal lath attached to a light wood frame. With this increased strength, stucco ceased to be just a veneer and became a more integral part of the building structure.


Caulking is not an appropriate method for repairing cracks in historic stucco.

Today, gypsum, which is hydrated calcium sulfate or sulfate of lime, has, to a great extent, replaced lime.  Gypsum is preferred because it hardens faster and has less shrinkage than lime. Lime is generally used only in the finish coat in contemporary stucco work.

The composition of stucco depends on local custom and available materials. Stucco often contains substantial amounts of mud or clay, marble or brick dust, or even sawdust, and an array of additives ranging from animal blood or urine, to eggs, keratin or gluesize (animal hooves and horns), varnish, wheat paste, sugar, salt, sodium silicate, alum, tallow, linseed oil, beeswax, and wine, beer or rye whiskey. Waxes, fats and oils were included to introduce water-repellent properties, sugary materials reduced the amount of water needed and slowed down the setting time, and alcohol acted as an air entrainer. All of these additives contribute to the strength and durability of the stucco.

The appearance of much stucco was determined by the color of the sand — or sometimes burnt clay — used in the mix.  Often, stucco was also tinted with natural pigments, or the surface whitewashed or color-washed after stuccoing was completed. Brick dust could provide color, and other coloring materials that were not affected by lime, mostly mineral pigments, could be added to the mix for the final finish coat. Stucco was also marbled or marbleized — stained to look like stone by diluting oil of vitriol (sulfuric acid) with water, and mixing this with a yellow ochre, or another color. As the 20th century progressed, manufactured and synthetic pigments were added at the factory to some prepared stucco mixes.

Methods of Application

Stucco is applied directly, without lath, to masonry substrates, such as brick, stone, concrete or hollow tile. But on wood structures, stucco, like its interior counterpart plaster, must be applied over lath in order to obtain an adequate key to hold the stucco. Thus, when applied over a log structure, stucco is laid on horizontal wood lath that has been nailed on vertical wood furring strips attached to the logs. If it is applied over a wood frame structure, stucco may be applied to wood or metal lath nailed directly to the wood frame; it may also be placed on lath that has been attached to furring strips. The furring strips are themselves laid over building paper covering the wood sheathing.


The dry materials must be mixed thoroughly before adding water to make the stucco.
Wood lath was gradually superseded by expanded metal lath introduced in the late 19th and early 20th centuries. When stuccoing over a stone or brick substrate, it was customary to cut back or rake out the mortar joints, if they were not already recessed, by natural weathering or erosion, and sometimes the bricks themselves were gouged to provide a key for the stucco. This helped provide the necessary bond for the stucco to remain attached to the masonry, much like the key provided by wood or metal lath on frame buildings.

Like interior wall plaster, stucco has traditionally been applied as a multiple-layer process, sometimes consisting of two coats, but more commonly as three. Whether applied directly to a masonry substrate or onto wood or metal lath, this consists of a first “scratch” or “pricking-up” coat, followed by a second scratch coat, sometimes referred to as a “floating” or “brown” coat, followed finally by the “finishing” coat. Up until the late 19th century, the first and the second coats were of much the same composition, generally consisting of lime or natural cement, sand, perhaps clay, and one or more of the additives previously mentioned. Straw or animal hair was usually added to the first coat as a binder. The third, or finishing coat, consisted primarily of a very fine mesh-grade of lime and sand, and sometimes pigment. As already noted, after the 1820s, natural cement was also a common ingredient in stucco, until it was replaced by Portland cement. Both masonry and wood lath must be kept wet or damp to ensure a good bond with the stucco. Wetting these materials helps to prevent them from pulling moisture out of the stucco too rapidly, which results in cracking, loss of bond, and generally poor-quality stucco work.

Traditional Stucco Finishes

Until the early 20th century when a variety of novelty finishes and textures were introduced, the last coat of stucco was commonly given a smooth, troweled finish, and then scored or lined in imitation of ashlar. The illusion of masonry joints was sometimes enhanced by a thin line of white lime putty, graphite, or some other pigment. Some 19th century buildings feature a water table or raised foundation of roughcast stucco that differentiates it from the stucco surface above, which is smooth and scored. Other novelty and textured finishes associated with the “period” or revival styles of the early 20th century include: the English cottage finish, adobe and Spanish, pebble-dashed or dry-dash surface, fan and sponge texture, reticulated and vermiculated, roughcast (or wet dash), and sgraffito.

Regular Maintenance

Although A.J. Downing alluded to stuccoed houses in Pennsylvania that had survived for over a century in relatively good condition, historic stucco is inherently not a particularly permanent or long-lasting building material. Regular maintenance is required to keep it in good condition. Unfortunately, many older and historic buildings are not always accorded this kind of care. An InterNACHI inspector can be consulted for advice regarding stucco maintenance.

Because building owners knew stucco to be a protective, but also somewhat fragile coating, they employed a variety of means to prolong its usefulness. The most common treatment was to whitewash stucco, often annually. The lime in the whitewash offered protection and stability, and helped to harden the stucco. Most importantly, it filled hairline cracks before they could develop into larger cracks and let in moisture. To improve water repellency, stucco buildings were also sometimes coated with paraffin, another type of wax, or other stucco-like coatings, such as oil mastics.

Assessing Damage

Most stucco deterioration is the result of water infiltration into the building’s structure, either through the roof, around chimneys, window and door openings, or excessive ground water or moisture penetrating through, or splashing up from the foundation. Potential causes of deterioration include: ground settlement lintel and door frame settlement; inadequate and leaking gutters and downspouts; intrusive vegetation; moisture migration within walls due to interior condensation and humidity; vapor drive problems caused by furnace, bathroom and kitchen vents; and rising damp resulting from excessive ground water and poor drainage around the foundation. Water infiltration will cause wood lath to rot, and metal lath and nails to rust, which eventually will cause stucco to lose its bond and pull away from its substrate.


The deteriorated surface of this catch basin is being re-stuccoed.

After the cause of deterioration has been identified, any necessary repairs to the building should be made first before repairing the stucco. Such work is likely to include repairs designed to keep excessive water away from the stucco, such as roof, gutter, downspout and flashing repairs, improving drainage, and redirecting rainwater runoff and splash-back away from the building. Horizontal areas, such as the tops of parapet walls and chimneys, are particularly vulnerable to water infiltration, and may require modifications to their original design, such as the addition of flashing to correct the problem.

Previous repairs inexpertly carried out may have caused additional deterioration, particularly if executed in Portland cement, which tends to be very rigid and, therefore, incompatible with early, mostly soft lime-based stucco that is more flexible. Incompatible repairs, external vibration caused by traffic and construction, and building settlement can also result in cracks which permit the entrance of water and cause the stucco to fail.

Before beginning any stucco repair, an assessment of the stucco should be undertaken to determine the extent of the damage, and how much must be replaced or repaired. Testing should be carried out systematically on all elevations of the building to determine the overall condition of the stucco. Some areas in need of repair will be clearly evidenced by missing sections of stucco or stucco layers. Bulging or cracked areas are obvious places to begin. Unsound, punky or soft areas that have lost their key will echo with a hollow sound when tapped gently with a wooden or acrylic hammer or mallet.

Identifying the Stucco Type

Analysis of the historic stucco will provide useful information on its primary ingredients and their proportions, and will help to ensure that the new replacement stucco will duplicate the old in strength, composition, color and texture as closely as possible. However, unless authentic, period restoration is required, it may not be worthwhile, nor in many instances even possible, to attempt to duplicate all of the ingredients (particularly some of the additives) in creating the new stucco mortar. Some items are no longer available, and others, notably sand and lime — the major components of traditional stucco — have changed radically over time. For example, most sand used in contemporary masonry work is manufactured sand, because river sand, which was used historically, is difficult to obtain today in many parts of the country. The physical and visual qualities of manufactured sand versus river sand are quite different, and this affects the way stucco works, as well as the way it looks. The same is true of lime, which is frequently replaced by gypsum in modern stucco mixes. And even if identification of all the items in the historic stucco mix were possible, the analysis would still not reveal how the original stucco was mixed and applied.

There are, however, simple tests that can be carried out on a small piece of stucco to determine its basic makeup. A dilute solution of hydrochloric (muriatic) acid will dissolve lime-based stucco, but not Portland cement. Although the use of Portland cement became common after 1900, there are no precise cutoff dates, as stuccoing practices varied among individual plasterers, and from region to region. Some plasterers began using Portland cement in the 1880s, but others may have continued to favor lime stucco well into the early 20th century. While it is safe to assume that a late-18th or early-19th century stucco is lime-based, late-19th or early-20th century stucco may be based on either lime or Portland cement. Another important factor to take into consideration is that an early lime-stucco building is likely to have been repaired many times over the ensuing years, and it is probable that at least some of these patches consist of Portland cement.

Planning the Repair

Once the extent of damage has been determined, a number of repair options may be considered. Small hairline cracks usually are not serious and may be sealed with a thin slurry coat consisting of the finish coat ingredients, or even with a coat of paint or whitewash.

Commercially available caulking compounds are not suitable materials for patching hairline cracks. Because their consistency and texture is unlike that of stucco, they tend to weather differently, and attract more dirt; as a result, repairs made with caulking compounds may be highly visible and unsightly. Larger cracks will have to be cut out in preparation for more extensive repair. Most stucco repairs will require the skill and expertise of a professional plasterer.


The stucco will be applied to the wire lath laid over the area to be patched.

In the interest of saving or preserving as much as possible of the historic stucco, patching rather than wholesale replacement is preferable. When repairing heavily textured surfaces, it is not usually necessary to replace an entire wall section, since the textured finish, if well-executed, tends to conceal patches, and helps them to blend in with the existing stucco. However, because of the nature of smooth-finished stucco, patching a number of small areas scattered over one elevation may not be a successful repair approach unless the stucco has been previously painted, or is to be painted following the repair work. On unpainted stucco, such patches are hard to conceal, because they may not match exactly or blend in with the rest of the historic stucco surface. For this reason, it is recommended, if possible, that stucco repair be carried out in a contained or well-defined area, or if the stucco is scored, the repair patch should be “squared-off” in such a way as to follow existing scoring. In some cases, especially in a highly visible location, it may be preferable to re-stucco an entire wall section or feature. In this way, any differences between the patched area and the historic surface will not be so readily apparent.

Repair of historic stucco generally follows most of the same principles used in plaster repair. First, all deteriorated, severely cracked and loose stucco should be removed down to the lath (assuming that the lath is securely attached to the substrate), or down to the masonry if the stucco is directly applied to a masonry substrate. A clean surface is necessary to obtain a good bond between the stucco and substrate. The areas to be patched should be cleaned of all debris with a bristle brush, and all plant growth, dirt, loose paint, oil and grease should be removed. If necessary, brick or stone mortar joints should then be raked out to a depth of approximately 5/8-inches to ensure a good bond between the substrate and the new stucco.

To obtain a neat repair, the area to be patched should be squared-off with a butt joint using a cold chisel, a hatchet, a diamond-blade saw, or a masonry bit. Sometimes, it may be preferable to leave the area to be patched in an irregular shape, which may result in a less conspicuous patch. Proper preparation of the area to be patched requires very sharp tools and extreme caution on the part of the plasterer not to break keys of surrounding good stucco by “over-sounding” when removing deteriorated stucco.

To ensure a firm bond, the new patch must not overlap the old stucco. If the stucco has lost its bond or key from wood lath, or the lath has deteriorated or come loose from the substrate, a decision must be made whether to try to re-attach the old lath, to replace deteriorated lath with new wood lath, or to leave the historic wood lath in place and supplement it with modern expanded metal lath. Unless authenticity is important, it is generally preferable (and easier) to nail new metal lath over the old wood lath to support the patch. Metal lath that is no longer securely fastened to the substrate may be removed and replaced in kind, or left in place and supplemented with new wire lath.

When repairing lime-based stucco applied directly to masonry, the new stucco should be applied in the same manner, directly onto the stone or brick. The stucco will bond onto the masonry itself without the addition of lath because of the irregularities in the masonry or those of its mortar joints, or because its surface has been scratched, scored or otherwise roughened to provide an additional key. Cutting out the old stucco at a diagonal angle may also help secure the bond between the new and the old stucco. For the most part, it is not advisable to insert metal lath when re-stuccoing historic masonry in sound condition, as it can hasten deterioration of the repair work. Not only will attaching the lath damage the masonry, but the slightest moisture penetration can cause metal lath to rust. This will cause metal to expand, eventually resulting in spalling of the stucco, and possibly the masonry substrate, too.


The final finish coat will be applied to this scratch coat.

If the area to be patched is properly cleaned and prepared, a bonding agent is usually not necessary. However, a bonding agent may be useful when repairing hairline cracks, or when dealing with substrates that do not offer a good bonding surface. These may include dense stone or brick, previously painted or stuccoed masonry, or spalling brick substrates. A good mechanical bond is always preferable to reliance on bonding agents. Bonding agents should not be used on a wall that is likely to remain damp or where large amounts of salt are present. Many bonding agents do not survive well under such conditions, and their use could jeopardize the longevity of the stucco repair.

A stucco mix compatible with the historic stucco should be selected after analyzing the existing stucco. It can be adapted from a standard traditional mix of the period, or based on one of the mixes included here. Stucco consisting mostly of Portland cement generally will not be physically compatible with the softer, more flexible, lime-rich historic stuccos used throughout the 18th and much of the 19th centuries. The differing expansion and contraction rates of lime stucco and Portland cement stucco will normally cause the stucco to crack. Choosing a stucco mix that is durable and compatible with the historic stucco on the building is likely to involve considerable trial and error, and probably will require a number of test samples, and even more, if it is necessary to match the color. It is best to let the stucco test samples weather as long as possible — ideally, one year, or at least through a change of seasons — in order to study the durability of the mix and its compatibility with the existing stucco, as well as the weathering of the tint, if the building will not be painted and color-match is an important factor.

If the test samples are not executed on the building, they should be placed next to the stucco remaining on the building to compare the color, texture and composition of the samples with the original. The number and thickness of stucco coats used in the repair should also match the original.

After thoroughly dampening the masonry or wood lath, the first scratch coat should be applied to the masonry substrate, or wood or metal lath, in a thickness that corresponds to the original (if extant), or generally about 1/4-inch to 3/8-inch. The scratch coat should be scratched or crosshatched with a comb to provide a key to hold the second coat. It usually takes 24 to 72 hours, and longer in cold weather, for each coat to dry before the next coat can be applied. The second coat should be about the same thickness as the first, and the total thickness of the first two coats should generally not exceed about 5/8-inch. This second or leveling coat should be roughened using a wood float with a nail protruding to provide a key for the final or finish coat. The finish coat, about 1/4-inch thick, is applied after the previous coat has initially set. If this is not feasible, the base coat should be thoroughly dampened when the finish coat is applied later. The finish coat should be worked to match the texture of the original stucco.

Colors and Tints for Historic Stucco Repair


The new addition on the right is stucco scored to imitate the limestone of the historic building on the left.

The color of most early stucco was supplied by the aggregate included in the mix — usually, the sand. Sometimes, natural pigments were added to the mix, and 18th- and 19th-century scored stucco was often marbleized or painted in imitation of marble and granite. Stucco was also frequently coated with whitewash or a colorwash. This tradition later evolved into the use of paint, its popularity depending on the vagaries of fashion, as much as a means of concealing repairs. Because most of the early colors were derived from nature, the resultant stucco tints tended to be mostly earth tones. This was true until the advent of brightly colored stucco in the early decades of the 20th century. This was the so-called “Jazz Plaster” developed by O.A. Malone, the “man who put color into California,” and who founded the California Stone Products Corporation in 1927. California stucco was revolutionary for its time as the first stucco/plaster to contain colored pigment in its pre-packaged factory mix.

When patching or repairing an historic stucco surface known to have been tinted, it may be possible to determine through visual or microscopic analysis whether the source of the coloring is sand, cement or pigment. Although some pigments or aggregates used traditionally may no longer be available, a sufficiently close color match can generally be approximated using sand, natural or mineral pigments, or a combination of these. Obtaining such a match will require testing and comparing the color of the dried test samples to the original. Successfully combining pigments in the dry stucco mix prepared for the finish coat requires considerable skill. The amount of pigment must be carefully measured for each batch of stucco. Overworking the mix can make the pigment separate from the lime. Changing the amount of water added to the mix, or using water to apply the tinted finish coat, will also affect the color of the stucco when it dries.

Generally, the color obtained by hand-mixing these ingredients will provide a sufficiently close match to cover an entire wall or an area distinct enough from the rest of the structure that the color differences will not be obvious. However, it may not work for small patches conspicuously located on a primary elevation, where color differences will be especially noticeable. In these instances, it may be necessary to conceal the repairs by painting the entire patched elevation, or even the whole building.

Many stucco buildings have been painted over the years, and will require re-painting after the stucco repairs have been made. Limewash or cement-based paint, latex paint, or oil-based paint are appropriate coatings for stucco buildings. The most important factor to consider when re-painting a previously painted or coated surface is that the new paint be compatible with any coating already on the surface. In preparation for re-painting, all loose and peeling paint, and other coating material not firmly adhered to the stucco, must be removed by hand-scraping or natural bristle brushes. The surface should then be cleaned.

Cement-based paints, most of which now contain some Portland cement and are really a type of limewash, have traditionally been used on stucco buildings. The ingredients were easily obtainable. Furthermore, the lime in such paints actually bonded or joined with the stucco and provided a very durable coating. In many regions, whitewash was applied annually during spring cleaning. Modern, commercially available, pre-mixed masonry and mineral-based paints may also be used on historic stucco buildings.

If the structure must be painted for the first time to conceal repairs, almost any of these coatings may be acceptable, depending on the situation. Latex paint, for example, may be applied to slightly damp walls or where there is an excess of moisture, but latex paint will not stick to chalky or powdery areas. Oil-based or alkyd paints must be applied only to dry walls; new stucco must cure up to a year before it can be painted with oil-based paint.

Contemporary Stucco Products

There are many contemporary stucco products on the market today. Many of them are not compatible, either physically or visually, with historic stucco buildings. Such products should be considered for use only after consulting with a specialist in historic masonry. However, some of these pre-packaged tinted stucco coatings may be suitable for use on stucco buildings dating from the late 19th and early 20th centuries, as long as the color and texture are appropriate for the period and style of the building. While some masonry contractors may, as a matter of course, suggest that a water-repellent coating be applied after repairing old stucco, in most cases, this should not be necessary, since color washes and paints serve the same purpose, and stucco itself is a protective coating.

Cleaning Historic Stucco Surfaces

Historic stucco buildings often exhibit multiple layers of paint or limewash. Although some stucco surfaces may be cleaned by water-washing, the relative success of this procedure depends on two factors: the surface texture of the stucco, and the type of dirt to be removed. If simply removing airborne dirt, smooth unpainted stucco, and heavily-textured painted stucco, may sometimes be cleaned using a low-pressure water wash, supplemented by scrubbing with soft natural bristle brushes, and possibly non-ionic detergents. Organic plant material, such as algae and mold, and metallic stains may be removed from stucco using poultices and appropriate solvents. Although these same methods may be employed to clean unpainted roughcast, pebble-dash, or any stucco surface featuring exposed aggregate, due to the surface irregularities, it may be difficult to remove dirt without also removing portions of the decorative textured surface. Difficulty in cleaning these surfaces may explain why so many of these textured surfaces have been painted.

When Total Replacement is Necessary

Complete replacement of the historic stucco with new stucco of either a traditional or modern mix will probably be necessary only in cases of extreme deterioration — that is, a loss of bond on over 40% to 50% of the stucco surface. Another reason for total removal might be that the physical and visual integrity of the historic stucco has been so compromised by prior incompatible and ill-conceived repairs that patching would not be successful.

When stucco no longer exists on a building, there is more flexibility in choosing a suitable mix for the replacement. Since compatibility of old and new stucco will not be an issue, the most important factors to consider are durability, color, texture and finish. Depending on the construction and substrate of the building, in some instances, it may be acceptable to use a relatively strong cement-based stucco mortar. This is certainly true for many late 19th and early 20th century buildings, and may even be appropriate to use on some stone substrates, even if the original mortar would have been weaker, as long as the historic visual qualities noted above have been replicated. Generally, the best principle to follow for a masonry building is that the stucco mix, whether for repair or replacement of historic stucco, should be somewhat weaker than the masonry to which it is to be applied in order not to damage the substrate.

General Guidance for Historic Stucco Repair

A skilled professional plasterer will be familiar with the properties of materials involved in stucco repair and will be able to avoid some of the pitfalls that would hinder someone less experienced. General suggestions for successful stucco repair parallel those involving restoration and repair of historic mortar and plaster. In addition, the following principles are important to remember:

  • Mix only as much stucco as can be used in one-and-a-half to two hours. This will depend on the weather (mortar will harden faster under hot and dry, or sunny conditions).  Experience is likely to be the best guidance. Any remaining mortar should be discarded; it should not be re-tempered.
  • Stucco mortar should not be over-mixed. (Hand mix it for 10 to 15 minutes after adding water, or machine-mix for three to four minutes after all ingredients are in mixer.) Over-mixing can cause crazing and discoloration, especially in tinted mortars. Over-mixing will also tend to make the mortar set too fast, which will result in cracking and poor bonding or keying to the lath or masonry substrate.
  • Wood lath or a masonry substrate, but not metal lath, must be thoroughly wetted before applying stucco patches so that it does not draw moisture out of the stucco too rapidly. To a certain extent, bonding agents also serve this same purpose. Wetting the substrate helps retard drying.
  • To prevent cracking, it is imperative that stucco not dry too fast. Therefore, the area to be stuccoed should be shaded, or even covered, if possible, particularly in hot weather. It is also a good idea in hot weather to keep the newly stuccoed area damp, at approximately 90% humidity, for a period of 48 to 72 hours.
  • Stucco repairs, like most other exterior masonry work, should not be undertaken in cold weather (below 40 degrees Fahrenheit, and preferably warmer), or if there is danger of frost.

Historic Stucco Textures

Most of the oldest stucco in the U.S. dating prior to the late 19th century will generally have a smooth, troweled finish (sometimes called a “sand” or “float” finish), possibly scored to resemble ashlar masonry units. Scoring may be incised to simulate masonry joints, the scored lines may be emphasized by black or white penciling, or the lines may simply be drawn or painted on the surface of the stucco. In some regions, at least as early as the first decades of the 19th century, it was not uncommon to use a roughcast finish on the foundation or base of an otherwise smooth-surfaced building. Roughcast was also used as an overall stucco finish for some out buildings, and other less-important types of structures.


This stucco house has a rough cast finish.

A wide variety of decorative surface textures may be found on revival-style stucco buildings, particularly residential architecture. These styles evolved in the late 19th century and peaked in popularity in the early decades of the 20th century. Frank Lloyd Wright favored a smooth-finish stucco, which was imitated on much of the Prairie-style architecture inspired by his work. Some of the more picturesque surface textures include: English Cottage or English Cotswold finish; sponge finish; fan texture; adobe finish; and Spanish or Italian finish. Many of these finishes and countless other regional and personalized variations on them are still in use.

The most common early 20th-century stucco finishes are often found on bungalow-style houses, and include: spatter or spatterdash (sometimes called roughcast, harling or wetdash), and pebble-dash or drydash. The spatterdash finish is applied by throwing the stucco mortar against the wall using a whisk broom or a stiff fiber brush, and it requires considerable skill on the part of the plasterer to achieve a consistently rough wall surface. The mortar used to obtain this texture is usually composed simply of a regular sand, lime and cement mortar, although it may sometimes contain small pebbles or crushed stone aggregate, which replaces half the normal sand content. The pebble-dash or drydash finish is accomplished manually by the plasterer throwing or “dashing” dry pebbles (about 1/8-inch to 1/4-inch in size)onto a coat of stucco freshly applied by another plasterer. The pebbles must be thrown at the wall with a scoop with sufficient force and skill that they will stick to the stuccoed wall. A more even or uniform surface can be achieved by patting the stones down with a wooden float. This finish may also be created using a texturing machine.

Stucco on historic buildings is especially vulnerable not only to the wear of time and exposure to the elements, but also at the hands of well-intentioned “restorers” who may want to remove stucco from 18th and 19th century structures to expose what they believe to be the original or more “historic” brick, stone or log underneath. Historic stucco is a character-defining feature and should be considered an important historic building material, significant in its own right. While many 18th and 19th century buildings were stuccoed at the time of construction, others were stuccoed later for reasons of fashion or practicality. As such, it is likely that this stucco has acquired significance, over time, as part of the history and evolution of a building. Thus, even later, non-historic stucco should be retained, in most instances; and similar logic dictates that new stucco should not be applied to an historic building that was not stuccoed previously. When repairing historic stucco, the new stucco should duplicate the old as closely as possible in strength, composition, color and texture.
This article was sourced from the Unites States National Park Service.

by Nick Gromicko, CMI®

A wood-burning stove (also known as a wood stove) is a heating appliance made from iron or steel that is capable of burning wood fuel. Unlike standard fireplaces, wood stoves are typically contained entirely within the living space, rather than inset in the wall.Photo courtesty of Wood-Stoves.org

Wood stoves come in many different sizes, each suited for a different purpose:

  • Small stoves are suitable in single rooms, seasonal cottages or small, energy efficient homes. These models can also be used for zone heating in large homes where supplemental heating is needed.
  • Medium-size stoves are appropriate for heating small houses or mid-size homes that are intended to be energy-efficient and as inexpensive as possible to maintain.
  • Large stoves are used in larger homes or older homes that leak air and are located in colder climate zones.

To ensure safe and efficient use of wood-burning stoves, inspectors can pass along the following tips to their clients:

Never:

  • burn coal. Coal burns significantly hotter than wood, posing a fire hazard;
  • burn materials that will emit toxic chemicals, such as wood that has been pressure-treated or painted, colored paper, gift wrap, plastic, plywood, particleboard, or questionable wood from furniture;
  • burn wet wood. Generally speaking, it takes six months for cut, stored wood to dry out and be ready for use in wood-burning stoves;
  • burn combustible liquids, such as kerosene, gasoline, alcohol or lighter fluid;
  • let small children play near a lit wood-burning stove. Unlike standard fireplaces, the sides of which are mostly inaccessible, all sides of wood stoves are exposed and capable of burning flesh or clothing; or
  • let the fire burn while the fire screen or door is open.

Always:

  • use a grate to hold the logs so that they remain secured in the stove and the air can circulate adequately to keep the fire burning hot;
  • keep the damper open while the stove is lit;
  • dispose of ashes outdoors in a water-filled, metal container;
  • check smoke alarms to make sure they are working properly; and
  • periodically remove the stovepipe between the stove and the chimney so that it can be inspected for creosote. Homeowners may want to hire a professional to perform this service.

Efficiency and Air PollutantsWood-burning stoves account for the smoke pictured in this photo taken in Chico, CA

While federal and state governments crack down on vehicle and industrial emissions, they do relatively little to limit the harmful air pollution emitted from wood stoves. The problem is so bad that, in many areas, such as Chico, Caifornia (pictured at right), the smoke from wood stoves is the largest single contributor to that city’s air pollution.  Smoke from wood stoves can cause a variety of health ailments, from asthma to cancer.

To mitigate these concerns, the EPA sets requirements for wood-stove emissions based on the design of the stove: 4.1 grams of smoke per hour (g/h) for catalytic stoves, and 7.5 g/h for non-catalytic stoves. Some state laws further restrict airborne particulates, and many new models emit as little as 1 g/h. These two approaches — catalytic and non-catalytic combustion — are described briefly as follows:

  • In catalytic stoves, the smoky exhaust passes through a coated, ceramic honeycomb that ignites particulates and smoke gasses. Catalysts degrade over time and must eventually be replaced, but they can last up to six seasons if the stove is used properly. Inadequate maintenance and the use of inappropriate fuel result in an early expiration of the catalyst. These stoves are typically more expensive than non-catalytic models, and they require more maintenance, although these challenges pay off through heightened efficiency.
  • Non-catalytic stoves lack a catalyst but have three characteristics that assist complete, clean combustion:  pre-heated combustion air introduced from above the fuel; firebox insulation; and a large baffle to create hotter, longer air flow in the firebox. The baffle will eventually need to be replaced as it deteriorates from combustion heat.

The following indicators hint that the fire in a wood-burning stove suffers from oxygen deprivation and incomplete combustion, which will increase the emission of particulates into the air:

  • It emits dark, smelly smoke. An efficient stove will produce little smoke.
  • There is a smoky odor in the house.
  • There is soot on the furniture.
  • The stove is burning at less than 300º F. A flue pipe-mounted thermometer should read between 300º F and 400º F.
  • The flames are dull and steady, rather than bright and lively.

To ensure efficiency, practice the following techniques:

  • Purchase a wood-burning stove listed by Underwriters Laboratories. Stoves tested by UL and other laboratories burn cleanly and efficiently.
  • Burn only dry wood. Wood that has a moisture content (MC) of less than 20% burns hotter and cleaner than freshly cut wood, which may contain half of its weight in water.
  • Burn hardwoods, such as oak, hickory and ash once the fire has started. Softwoods, such as pine, ignite quicker and are excellent fire starters.
  • Make sure the stove is properly sized for the space. Stoves that are too large for their area burn inefficiently.
  • Burn smaller wood rather than larger pieces. Smaller pieces of wood have a large surface area, which allows them to burn hotter and cleaner.
In summary, wood-burning stoves, if properly designed and used appropriately for the space, are efficient, clean ways to heat a home.  This article is from InterNACHI and can be found at https://www.nachi.org/wood-burning-stoves.htm.

by Nick Gromicko, CMI® and Kenton Shepard

Temperature/pressure-relief or TPR valves are safety devices installed on water heating appliances, such as boilers and domestic water supply heaters. TPRs are designed to automatically release water in the event that pressure or temperature in the water tank exceeds safe levels.
If temperature sensors and safety devices such as TPRs malfunction, water in the system may become superheated (exceed the boiling point). Once the tank ruptures and water is exposed to the atmosphere, it will expand into steam almost instantly and occupy approximately 1,600 times its original volume. This process can propel a heating tank like a rocket through multiple floors, causing personal injury and extensive property damage.
Water-heating appliance explosions are rare due to the fact that they require a simultaneous combination of unusual conditions and failure of redundant safety components. These conditions only result from extreme negligence and the use of outdated or malfunctioning equipment.

The TPR valve will activate if either water temperature (measured in degrees Fahrenheit) or pressure (measured in pounds per square inch [PSI]) exceed safe levels. The valve should be connected to a discharge pipe (also called a drain line) that runs down the length of the water heater tank. This pipe is responsible for routing hot water released from the TPR to a proper discharge location.

It is critical that discharge pipes meet the following requirements, which can be found in InterNACHI’s Water Heater Discharge Piping mini-course, at www.nachi.org/education. A discharge pipe should: tpr valve from home inspection rapid city sd
  1. be constructed of an approved material, such as CPVC, copper, polyethylene, galvanized steel, polypropylene, or stainless steel. PVC and other non-approved plastics should not be used since they can easily melt.
  2. not be smaller than the diameter of the outlet of the valve it serves (usually no smaller than 3/4″).
  3. not reduce in size from the valve to the air gap (point of discharge).
  4. be as short and as straight as possible so as to avoid undue stress on the valve.
  5. be installed so as to drain by flow of gravity.
  6. not be trapped, since standing water may become contaminated and backflow into the potable water.
  7. discharge to a floor drain, to an indirect waste receptor, or to the outdoors.
  8. not be directly connected to the drainage system to prevent backflow of potentially contaminating the potable water.
  9. discharge through a visible air gap in the same room as the water-heating appliance.
  10. be first piped to an indirect waste receptor such as a bucket through an air gap located in a heated area when discharging to the outdoors in areas subject to freezing, since freezing water could block the pipe.
  11. not terminate more than 6 inches (152 mm) above the floor or waste receptor.
  12. discharge in a manner that could not cause scalding.
  13. discharge in a manner that could not cause structural or property damage.
  14. discharge to a termination point that is readily observable by occupants, because discharge indicates that something is wrong, and to prevent unobserved termination capping.
  15. be piped independently of other equipment drains, water heater pans, or relief valve discharge piping to the point of discharge.
  16. not have valves anywhere.
  17. not have tee fittings.
  18. not have a threaded connection at the end of the pipe so as to avoid capping.
Leakage and Activation
A properly functioning TPR valve will eject a powerful jet of hot water from the discharge pipe when fully activated, not a gentle leak. A leaky TPR valve is an indication that it needs to be replaced. In the rare case that the TPR valve does activate, the homeowner should immediately shut off the water and contact a qualified plumber for assistance and repair.
Inspectors should recommend that homeowners test TPR valves monthly, although inspectors should never do this themselves. The inspector should demonstrate to the homeowner how the main water supply can be shut off, and explain that it can be located at the home’s main water supply valve, or at the water supply shut-off for the appliance on which the TPR is mounted.
TPR Data Plate Information
  • The pressure at which a TPR valve will activate is printed on a data plate located beneath the test lever. This amount should not exceed the working pressure limit marked on the data plate of the water-heating appliance it serves.
  • The BTU/HR rating marked on the water-heating appliance data plate should not exceed that of the TPR, which is marked on the TPR data plate.
  • TPR valves with missing data plates should be replaced.

Although a TPR valve might never become activated, it is an essential safety component on boilers and domestic water heaters. Guidelines concerning these valves and their discharge pipes reflect real hazards that every homeowner and home inspector should take seriously. This article is from InterNACHI and can be found at https://www.nachi.org/tpr-valves-discharge-piping.htm.

by Nick Gromicko, CMI® and Kenton Shepard

Knob-and-tube (K&T) wiring was an early standardized method of electrical wiring in buildings, in common use in North America from about 1880 to the 1940s. The system is considered obsolete and can be a safety hazard, although some of the fear associated with it is undeserved.

InterNACHI inspectors should always disclaim knob-and-tube wiring during their inspections.

Facts About Knob-and-Tube Wiring:Knob and Tube Wiring might see this type of wiring during a home inspection

  • It is not inherently dangerous. The dangers from this system arise from its age, improper modifications, and situations where building insulation envelops the wires.
  • It has no ground wire and thus cannot service any three-pronged appliances.
  • While it is considered obsolete, there is no code that requires its complete removal.
  • It is treated differently in different jurisdictions. In some areas, it must be removed at all accessible locations, while others don’t, but inspect it for safety reasons.
  • It is not permitted in any new construction.

How Knob-and-Tube Wiring Works:           

K&T wiring consists of insulated copper conductors passing through lumber framing drill-holes via protective porcelain insulating tubes. They are supported along their length by nailed-down porcelain knobs. Where wires enter a wiring device, such as a lamp or switch, or were pulled into a wall, they are protected by flexible cloth or rubber insulation called “loom.”

Advantages of Knob-and-Tube Wiring:

  • K&T wiring has a higher ampacity than wiring systems of the same gauge. The reason for this is that the hot and neutral wires are separated from one another, usually by 4 to 6 inches, which allows the wires to readily dissipate heat into free air.
  • K&T wires are less likely than Romex cables to be punctured by nails because K&T wires are held away from the framing.
  • The porcelain components have an almost unlimited lifespan.
  • The original installation of knob-and-tube wiring is often superior to that of modern Romex wiring. K&T wiring installation requires more skill to install than Romex and, for this reason, unskilled people rarely ever installed it.

Problems Associated with K&T Wiring:

  • Unsafe modifications are far more common with K&T wiring than they are with Romex and other modern wiring systems. Part of the reason for this is that K&T is so old that more opportunity has existed for improper modifications.
  • The insulation that envelopes the wiring is a fire hazard.
  • It tends to stretch and sag over time.
  • It lacks a grounding conductor. Grounding conductors reduce the chance of electrical fire and damage to sensitive equipment.
  • In older systems, wiring is insulated with varnish and fiber materials that are susceptible to deterioration.

Compared with modern wiring insulation, K&T wiring is less resistant to damage.  K&T wiring insulated with cambric and asbestos is not rated for moisture exposure. Older systems contained insulation with additives that may oxidize copper wire. Bending the wires may cause insulation to crack and peel away.

K&T wiring is often spliced with modern wiring incorrectly by amateurs. This is perhaps due to the ease by which K&T wiring is accessed.

Building Insulation:

K&T wiring is designed to dissipate heat into free air, and insulation will disturb this process. Insulation around K&T wires will cause heat to build up, and this creates a fire hazard. The 2008 National Electrical Code (NEC) requires that this wiring system not be covered by insulation. Specifically, it states that this wiring system should not be in…

hollow spaces of walls, ceilings and attics where such spaces are insulated by loose, rolled or foamed-in-place insulating material that envelops the conductors.

Local jurisdictions may or may not adopt the NEC’s requirement. The California Electrical Code, for instance, allows insulation to be in contact with knob-and-tube wiring, provided that certain conditions are met, such as, but not limited to, the following:

  • A licensed electrical contractor must certify that the system is safe.
  • The certification must be filed with the local building department.
  • Accessible areas where insulation covers the wiring must be posted with a warning sign. In some areas, this sign must be in Spanish and English.
  • The insulation must be non-combustible and non-conductive.
  • Normal requirements for insulation must be met.

Modifications:Knob and Tube Wiring on thermal insulation found during a home inspection

When K&T wiring was first introduced, common household electrical appliances were limited to little more than toasters, tea kettles, coffee percolators and
clothes irons. The electrical requirements of mid- to late-20th century homes
could not have been foreseen during the late 18th century, a time during which electricity, to many, was seen as a passing fad. Existing K&T systems are notorious for modifications made in an attempt to match the increasing amperage loads required by televisions, refrigerators, and a plethora of other electric appliances. Many of these attempts were made by insufficiently trained handymen, rather than experienced electricians, whose work made the wiring system vulnerable to overloading.
  • Many homeowners adapted to the inadequate amperage of K&T wiring by installing fuses with resistances that were too high for the wiring. The result of this modification is that the fuses would not blow as often and the wiring would suffer heat damage due to excessive amperage loads.
  • It is not uncommon for inspectors to find connections wrapped with masking tape or Scotch tape instead of electrical tape.

K&T Wiring and Insurance:

Many insurance companies refuse to insure houses that have knob-and-tube wiring due to the risk of fire. Exceptions are sometimes made for houses where an electrical contractor has deemed the system to be safe.

Advice for those with K&T wiring:

  • Have the system evaluated by a qualified electrician. Only an expert can confirm that the system was installed and modified correctly.
  • Do not run an excessive amount of appliances in the home, as this can cause a fire.
  • Where the wiring is brittle or cracked, it should be replaced. Proper maintenance is crucial.
  • K&T wiring should not be used in kitchens, bathrooms, laundry rooms or outdoors. Wiring must be grounded in order to be used safely in these locations.
  • Rewiring a house can take weeks and cost thousands of dollars, but unsafe wiring can cause fires, complicate estate transactions, and make insurers skittish.
  • Homeowners should carefully consider their options before deciding whether to rewire their house.
  • The homeowner or an electrician should carefully remove any insulation that is found surrounding K&T wires.
  • Prospective home buyers should get an estimate of the cost of replacing K&T wiring. They can use this amount to negotiate a cheaper price for the house.

In summary, knob-and-tube wiring is likely to be a safety hazard due to improper modifications and the addition of building insulation. Inspectors need to be wary of this old system and be prepared to inform their clients about its potential dangers. This article is from InterNACHI and can be found at https://www.nachi.org/knob-and-tube.htm.

by Nick Gromicko, CMI® and Ben Gromicko

Polyurethane spray foam is a versatile insulation material that is sprayed into building cavities where it quickly expands and molds itself to its surroundings. It is available in “closed-cell” and “open-cell” varieties, each of which offers advantages and disadvantages, depending on the requirements of its application. The following guide briefly explains the differences between these insulation options.Contractor installng spray foam insulation near rapid city

Closed-Cell Polyurethane Foam

Closed-cell polyurethane foam (CCPF) is composed of tiny cells with solid, unbroken cell walls that resemble inflated balloons piled tightly together. The cells are inflated with a special gas selected to make the insulation value of the foam as high as possible. Like the inflated tires that hold up an automobile, the gas-filled bubbles, when dried, create a material that is strong enough to walk on without major distortion. Wall-racking strength can by enhanced when CCPF is applied, and its strength makes it preferable for roofing applications. The high thermal resistance of the gas gives CCPF an R-value of approximately R-7 to R-8 per inch, according to the U.S. Department of Energy (DOE), which is significantly better than its open-cell alternative. It also acts as a vapor barrier, making it the product of choice if the insulation is likely to be exposed to high levels of moisture. Its density is generally 2 lb/ft3 (32 kilograms per cubic meter [kg/m3]).

Over time, the R-value of CCPF can drop as some of the low-conductivity gas escapes and is replaced with ordinary air, a process known as thermal drift. Research performed by the DOE revealed that most thermal drift occurs within the first two years after the insulation material is applied, but then the foam remains relatively unchanged unless it is damaged.
Foam is a Fire Hazard
Semi-permeable rigid foam insulation and spray foam insulation (foam plastic) on the inside of basement foundation walls is often found during an inspection of the full-basement foundation of a house.  Its use could be a good strategy for a moisture-resistant finished basement. However, fire and smoke characteristics of this type of insulation require that it be covered with a fire-resistant layer, such as gypsum wallboard (drywall).
Sometimes this requirement works fine when the basement is being finished. This requirement of having spray foam insulation to be protected by a thermal barrier is found in the International Residential Code (IRC) 2015 Section R316. In most cases where spray polyurethane foam insulation is installed, the foam should be separated from the interior living spaces by an approved thermal barrier of at least 1/2-inch gypsum wallboard (drywall), 23/32-inch wood structural panel, or a material tested to meet the acceptable criteria from NFPA. There are a few exceptions to this requirement, including flame spread index ratings.
If a basement will only be insulated and not finished, a fire-rated foam panel or similar fire-rated covering needs to be used. Because the above-grade portions of the basement wall can dry to the outside, fire-rated insulation on these surfaces may be of an impermeable type. For example, it can have a foil facing.  But insulating approaches that restrict the drying potential of below-grade portions of the foundation wall toward the inside should be avoided.

In attics, a thermal barrier is not required when several conditions exist. Those conditions are listed within the IRC Code 2015 Section R316, and they include the attic access is required, the attic space is entered for only maintenance and when repairs are needed, and the foam insulation has been tested or the foam insulation is protected again ignition using a listed barrier material.

Packages and containers of spray foam insulation (or foam plastic) should be labeled and identified if they are delivered to a building site.

Open-Cell Polyurethane Foam

Open-cell polyurethane foam (OCPF) is a soft, flexible, spongy insulation with broken cell walls that permit air to fill them. They typically have a density of 0.5 lb/ft3 (8 kilograms per cubic meter [kg/m3]), which is significantly less than closed-cell insulation, as well as having a reduced R-value per inch, although OCPF still has excellent thermal-insulating and air-barrier properties. The foam is weaker and less rigid than closed-cell foams, too. It will require trimming and disposal of excess material as it expands to over 100 times its initial liquid size.

Builders often choose open-cell foam for the following advantages it affords, including:

  • its low cost. Where economical yield is important, open-cell foam is generally chosen over its more costly alternative;
  • providing a sound barrier. OCPF forms a more effective sound barrier in normal-frequency ranges than closed-cell foam. For this reason, OCPF is well-suited for installation beneath floors and around theater rooms;
  • its flexibility. Open-cell foam is more flexible than closed-cell foam, which allows it to adjust to weather-induced expansion and contraction of framing members. CCPF, by contrast, may develop hairline fractures because it cannot flex sufficiently; and
  • its permeability to moisture. While often cited as a reason to avoid the use of OCPF, in certain situations, it can be helpful for moisture to pass through insulation. Open-cell foam used in roofs, for instance, will allow a roof leak to make its way to the space below where it is more likely to be discovered. Closed-cell foam used in the same application would trap the moisture, hiding the leak and potentially leading to wood decay. In most situations, however, OCPF should not be used in any place where it might become wet, as moisture will diminish its insulative value. InterNACHI inspectors may call out open-cell insulation discovered in moist areas, such as in external applications or below grade.
In summary, polyurethane foam is available in two varieties that are suited for different applications.  This article is from InterNACHI and can be found at https://www.nachi.org/polyurethane-spray-foam.htm.

by Nick Gromicko, CMI®

A pilot light is a small flame that is kept alight constantly in order to serve as an ignition source for a gas burner. They are used on many natural gas and propane appliances, such as water heaters, clothes dryers, central heating systems, fireplaces and stoves. Pilot light from home inspection spearfish sd

The pilot light is fueled by a small amount of gas released from the gas pipe. When the appliance is turned on, a valve releases more gas, which is ignited by the pilot light. The light may need to be re-lit from time to time after being extinguished on purpose or by accident. Modern alternatives to the pilot light include a high-voltage electric arc between two electrodes placed close to the gas flow, and a red-hot surface made from silicon carbide, silicon nitride, or another material that can withstand prolonged heat exposure. While most commercial kitchens still rely on pilot lights for ovens and grills, their residential counterparts typically use electrical ignitions.

Safety

If a pilot light is accidentally extinguished, there exists a danger that the gas used to keep the flame lit will continue to vent, possibly into the living space. If this leak continues, its concentration may reach a point where a spark – such as that from a cigarette lighter, static electricity, or even the pilot light itself as it is re-lit – will cause a fire or even an explosion. As a precaution, the flow of gas to the pilot light is maintained by electrical circuitry that relies on the detection of the flame by a sensor.
Modern appliances that use pilot lights should be equipped with one or more of the following sensors types:
  • a photo-resistor, which detects the light emitted by the pilot light;
  • a thermometer, which detects the heat created by the pilot light; or
  • a voltmeter, which detects the electrical current created by the heat of the flame as it warms a thermocouple.  A thermocouple is a device that creates a voltage related to the temperature difference at the junction of two different metals.

Natural gas and propane can usually be detected by building occupants by their odor, which is added to these naturally odorless fuels specifically to alert people to a lurking danger. Numerous injuries have been reported, however, when homeowners have tried to re-light a pilot light after the appliance’s malfunctioning sensor failed to stop the flow of gas into the room. Thermocouples are degraded by continued exposure to the pilot light’s flame, which increases their electrical resistance and reduces their effectiveness as flame sensors. Periodic testing and replacement of these devices will mitigate the safety hazards posed by pilot light-equipped appliances.

While many inspectors and homeowners may not be aware of the danger, a number of houses are destroyed every year when a pilot light ignites the explosive gasses released from insecticide “bug bombs” and foggers. A fire erupted in a Newburgh, Ohio house after a man placed a roach fumigator under his kitchen sink and the fumes reached his oven’s pilot light. Even worse, when homeowners employ a recklessly large number of these foggers, they can generate enough gas to create a catastrophic explosion, and the determination of homeowners driven mad by cockroaches and fleas is occasionally enough incentive for them to employ such overkill. In one case, 19 foggers were Bug bombs were detonated by a pilot light, destroying this small San Diego homeunleashed in a 470-square foot San Diego home, filling the building with so much gas that the pilot light destroyed the home and launched shrapnel into the street. Fortunately, foggers are typically used in buildings that have been vacated. Three men were hospitalized, however, when an oven’s pilot light in a Thai restaurant in Perth, Australia ignited the gas released from 36 foggers – enough to blow the roof off the building in a massive explosion that rocked the suburban neighborhood, causing $500,000 in damages.

Energy Waste

Pilot lights are not needed for the majority of the time that they’re lit, which is how they waste a large amount of fuel. The exact amount of energy wasted depends on the unit, but various studies report that a pilot light burns $7.50 to $18 per month of natural gas, and even more for propane-fueled appliances. They waste more than 20% of the gas used in the United States, according to Cornell Environmental Health and Safety. A constantly burning pilot light also adds heat to the house, which might be useful in the winter, but adds to the heat load in the summer and places an unnecessarily greater burden on the air-conditioning system. Even in the winter, the appliance may be located in a utility room or other area that doesn’t require heating. Also, a typical pilot light can generate 450 pounds of carbon dioxide – a greenhouse gas — over a six-month period.

If an appliance isn’t needed for a long period of time, its pilot light may be extinguished to save energy, reduce greenhouse gas emissions, and reduce the risk of fire or explosion. Concerned homeowners can also purchase appliances equipped with the aforementioned alternatives to the pilot light. If they have any additional issues or concerns related to pilot lights or fuel-burning appliances, they should consult with an InterNACHI inspector during their next scheduled inspection.

In summary, pilot lights are a somewhat antiquated technology plagued by fears concerning fire and energy waste.  This article is from InterNACHI and can be found at https://www.nachi.org/pilot-lights.htm.

You can schedule you home inspection with Red Horse Home Inspection online.  Follow us on Facebook to see our newest post.

by Nick Gromicko, CMI® and Ethan Ward

What is a GFCI?

A ground-fault circuit interrupter, or GFCI, is a device used in electrical wiring to disconnect a circuit when unbalanced current is detected between an energized conductor and a neutral return conductor.  Such an imbalance is sometimes caused by current “leaking” through a person who is simultaneously in contact with a ground and an energized part of the circuit, which could result in lethal shock.  GFCIs are designed to provide protection in such a situation, unlike standard circuit breakers, which guard against overloads, short circuits and ground faults.
It is estimated that about 300 deaths by electrocution occur every year, so the use of GFCIs has been adopted in new construction, and recommended as an upgrade in older construction, in order to mitigate the possibility of injury or fatality from electric shock.

History

The first high-sensitivity system for detecting current leaking to ground was developed by Henri Rubin in 1955 for use in South African mines.  This cold-cathode system had a tripping sensitivity of 250 mA (milliamperes), and was soon followed by an upgraded design that allowed for adjustable trip-sensitivity from 12.5 to 17.5 mA.  The extremely rapid tripping after earth leakage-detection caused the circuit to de-energize before electric shock could drive a person’s heart into ventricular fibrillation, which is usually the specific cause of death attributed to electric shock.

Charles Dalziel first developed a transistorized version of the ground-fault circuit interrupter in 1961.  Through the 1970s, most GFCIs were of the circuit-breaker type.  This version of the GFCI was prone to frequent false trips due to poor alternating-current characteristics of 120-volt insulations.  Especially in circuits with long cable runs, current leaking along the conductors’ insulation could be high enough that breakers tended to trip at the slightest imbalance.

Since the early 1980s, ground-fault circuit interrupters have been built into outlet receptacles, and advances in design in both receptacle and breaker types have improved reliability while reducing instances of “false trips,” known as nuisance-tripping.

NEC Requirements for GFCIs

The National Electrical Code (NEC) has included recommendations and requirements for GFCIs in some form since 1968, when it first allowed for GFCIs as a method of protection for underwater swimming pool lights.  Throughout the 1970s, GFCI installation requirements were gradually added for 120-volt receptacles in areas prone to possible water contact, including bathrooms, garages, and any receptacles located outdoors.

The 1980s saw additional requirements implemented.  During this period, kitchens and basements were added as areas that were required to have GFCIs, as well as boat houses, commercial garages, and indoor pools and spas.  New requirements during the ’90s included crawlspaces, wet bars and rooftops.  Elevator machine rooms, car tops and pits were also included at this time.  In 1996, GFCIs were mandated for all temporary wiring for construction, remodeling, maintenance, repair, demolition and similar activities and, in 1999, the NEC extended GFCI requirements to carnivals, circuses and fairs.

The 2008 NEC contains additional updates relevant to GFCI use, as well as some exceptions for certain areas.  The 2008 language is presented here for reference.

2008 NEC on GFCIs

100.1 Definition

100.1  Definitions. Ground-Fault Circuit Interrupter. A device intended for the protection of personnel that functions to de-energize a circuit or portion thereof within an established period of time when a current to ground exceeds the values established for a Class A device.

FPN: Class A ground-fault circuit interrupters trip when the current to ground has a value in the range of 4 mA to 6 mA.  For further information, see UL 943, standard for Ground-Fault Circuit Interrupters.

210.8(A)&(B)  Protection for Personnel

210.8 Ground-Fault Circuit Interrupter Protection for Personnel.

(A)  Dwelling Units. All 125-volt, single-phase, 15- and 20-ampere receptacles installed in the locations specified in (1) through (8) shall have ground-fault circuit-interrupter protection for personnel.

(1)   bathrooms;


(2)   garages, and also accessory buildings that have a floor located at or below grade level not intended as habitable rooms and limited to storage areas, work areas, and areas of similar use;

Exception No. 1: Receptacles not readily accessible.

Exception No. 2: A single receptacle or a duplex receptacle for two appliances that, in normal use, is not easily moved from one place to another and that is cord-and-plug connected in accordance with 400.7(A)(6), (A)(7), or (A)(8).

Receptacles installed under the exceptions to 210.8(A)(2) shall not be considered as meeting the requirements of 210.52(G)

(3)   outdoors;

Exception: Receptacles that are not readily accessible and are supplied by a dedicated branch circuit for electric snow melting or deicing equipment shall be permitted to be installed in accordance with the applicable provisions of Article 426.

(4)   crawlspaces at or below grade level.

Exception No. 1: Receptacles that are not readily accessible.

Exception No. 2:  A single receptacle or a duplex receptacle for two appliances that, in normal use, is not easily moved from one place to another and that is cord-and-plug connected in accordance with 400.7(A)(6), (A)(7), or (A)(8).

Exception No. 3: A receptacle supplying only a permanently installed fire alarm or burglar alarm system shall not be required to have ground-fault circuit interrupter protection.

Receptacles installed under the exceptions to 210.8(A)(2) shall not be considered as meeting the requirements of 210.52(G)

(6)   kitchens, where the receptacles are installed to serve the countertop surfaces;

(7)   wet bar sinks, where the receptacles are installed to serve the countertop surfaces and are located within 6 feet (1.8 m) of the outside edge of the wet bar sink;

(8)   boathouses;

(B) Other Than Dwelling Units. All 125-volt, single-phase, 15- and 20-ampere receptacles Installed in the locations specified in (1), (2), and (3) shall have ground-fault circuit interrupter protection for personnel:

(1)   bathrooms;

(2)   rooftops;

Exception: Receptacles that are not readily accessible and are supplied by a dedicated branch circuit for electric snow-melting or de-icing equipment shall be permitted to be installed in accordance with the applicable provisions of Article 426.

(3)   kitchens.

Testing Receptacle-Type GFCIs

Receptacle-type GFCIs are currently designed to allow for safe and easy testing that can be performed without any professional or technical knowledge of electricity.  GFCIs should be tested right after installation to make sure they are working properly and protecting the circuit.  They should also be tested once a month to make sure they are working properly and are providing protection from fatal shock.
To test the receptacle GFCI, first plug a nightlight or lamp into the outlet. The light should be on.  Then press the “TEST” button on the GFCI. The “RESET” button should pop out, and the light should turn off.
If the “RESET” button pops out but the light does not turn off, the GFCI has been improperly wired. Contact an electrician to correct the wiring errors.

If the “RESET” button does not pop out, the GFCI is defective and should be replaced.

If the GFCI is functioning properly and the lamp turns off, press the “RESET” button to restore power to the outlet.  This article if from InterNACHI and can be found athttps://www.nachi.org/gfci.htm.

by Nick Gromicko, CMI®

Rodents are a problem not just because they can destroy personal property and create problems with a home’s structure, but also because they can spread serious diseases to humans and their pets. Rodent-borne disease may be spread directly — by touching rodents or their Rat in a PVC pipeurine, feces or saliva — or indirectly — by coming into contact with fleas or other insects that have fed on an infected rodent host. Inspectors should use extreme caution and wear appropriate personal protective equipment when entering a home that is known to be infested with rodents.
Some diseases resulting from direct contact with mice and rats include:
  • hantavirus pulmonary syndrome;
  • hemorrhagic fever with renal; syndrome;
  • Lassa fever;
  • leptospirosis;
  • lymphocytic chorio-meningitis;
  • plague;
  • rat-bite fever;
  • salmonellosis;
  • South American arenaviruses; and
  • tularemia.
Some diseases resulting from indirect contact with mice and rats include:
  • babesiosis;
  • Colorado tick fever;
  • human granulocytic anaplasmosis;
  • lyme disease;
  • murine typhus;
  • scrub typhus;
  • rickettsialpox;
  • relapsing fever; and
  • Rocky Mountain spotted fever.

Rodents also pose a danger to the integrity of the structures they inhabit. They have strong teeth and they may chew through structures to gain access to food sources. The best method for preventing exposure to rodents is to prevent rodent infestation in the first place, according to the Centers for Disease Rodent trapControl (CDC) and the U.S. Environmental Protection Agency (EPA).

How can you tell that a home is infested?
Actual rodent sightings in the home are a good indicator that a severe infestation may be in progress.  Mild cases of infestation might not result in actual rodent sightings.
Indicators of an infestation are:
  • chewing or clawing sounds that come from inside or outside a home. Noises may even come from the roof, as tree-dwelling rodents may try to gain access to a home from above the living space;
  • stale smells coming from hidden areas;
  • evidence of structural damage that can provide entry points into the home;
  • evidence of gnawing and chewing on food packaging;
  • nesting material found in small piles, such as shredded paper, fabric or dried plant matter; and
  • rodent droppings anywhere in the home, especially near food packages in drawers and cupboards, and under the sink.
How can rodent infestation be prevented?
The following measures can be taken to eliminate rodents’ food sources, according to the CDC:
  • Keep food in thick plastic or metal containers with tight-fitting lids.
  • Clean up spilled food right away, and wash dishes and cooking utensils soon after use.
  • Keep outside cooking areas and grills clean.
  • Always put pet food away after use and do not leave pets’ food or water bowls out overnight.
  • Keep bird feeders away from the house.  Utilize squirrel guards to limit access to the feeder by squirrels and other rodents.
  • Use thick plastic or metal garbage cans with tight-fitting lids.
  • Keep compost bins as far away from the house as possible.
  • Dispose of trash and garbage on a frequent and regular basis, and eliminate clutter in and around the property to discourage nesting.
Mice can squeeze through a hole the size of a nickel, and rats can squeeze through a hole the size of a half dollar, according to the CDC. Consequently, smaller gaps may be filled cheaply and easily with steel wool and caulk may be used to seal it in place. Larger gaps and holes may be filled with lath screen or lath metal, cement, hardware cloth or metal sheeting.
Common places where gaps may be found inside the home are:
  • inside, under and behind kitchen cabinets, refrigerators and stoves;
  • inside closets near the floor’s corners;
  • around the fireplace;
  • around doors;
  • around plumbing pipes under sinks and washing machines;
  • around the piping for hot water heaters and furnaces;
  • around floor vents and dryer vents;
  • inside the attic;
  • in the basement or crawlspace;
  • near the basement and laundry room floor drains; and
  • between the floor and wall juncture.
Common places where gaps may be found outside the home are:
  • in the roof among the rafters, gables and eaves;
  • around windows;
  • around doors;
  • around the foundation;
  • near attic vents and crawlspace vents;
  • under doors; and
  • around holes for electrical, plumbing, cable and gas lines.
Any potential nesting sites outside the home should be eliminated. Elevate hay, woodpiles and garbage cans at least 1 foot off the ground. Move woodpiles far away from the house. Get rid of old trucks, cars and old tires that mice and rats could use as homes. Keep grass cut short, and keep shrubbery within 100 feet of the home well-trimmed.
What should be done if a house is found to be infested with rodents?
It is important to stay away from rodents, and to protect children and pets from direct and indirect contact if they are found in the home. Droppings should be handled only with extreme caution, even if they have dried. A face mask and gloves should be worn if handling and cleaning up these droppings because disturbing fecal particles may precipitate airborne contaminants. Affected areas should be sterilized after the droppings have been removed.All holes, cracks, and gaps in a home should be sealed to keep out rodents
In mild cases of infestation, homeowners may choose to eliminate the rodents themselves. They should make sure to take preventative measures while doing so.  To remove rodents, homeowners will need to use traps or rodenticides.
Some different types of traps include:
  • lethal traps, such as snap traps, that are designed to trap and kill rodents;
  • live traps, such as cage-type traps, that capture rodents alive and unharmed, requiring that the rodents then be released or killed; and
  • glue boards, which are low-cost devices that use sticky substances to trap rodents, requiring a further decision regarding disposal, since such traps are not lethal.
Traps should be set in any area where there is evidence of frequent rodent activity. Some rodents, particularly rats, are very cautious and several days may pass before they approach the traps. Other rodents, such as house mice and deer mice, are less cautious and may be trapped more quickly. Glue traps and live traps may scare mice that are caught live, causing them to urinate. This may increase a homeowner’s risk of being exposed to diseases, since the rodent urine may contain germs or disease-borne pathogens.

Rodenticides are products intended to kill rodents, and are typically sold as powders in bait and tracking form.  Some rodenticides include:

  • baits, which combine rodenticides with food to attract rodents.  They may be formulated as blocks or paste and may be enclosed in a bait station;
  • tracking powders, which are rodenticides combined with a powdery material.  The powder sticks to the rodents’ feet and fur and is swallowed when the animals groom themselves.  After consuming the chemical poison contained in the bait or tracking powder, the rodents die.  Some rodenticides (including tracking powders) may be legally applied only by certified pesticide applicators because they may pose a risk to human health.
The following measures should be observed when an infestation is being eliminated:
  • Traps and baits should be placed in areas where children and pets cannot reach them.
  • Products should be used according to the label’s directions and precautions.
  • Only traps that are appropriate to the type and size of the targeted rodent should be used.
  • Glue boards should be placed in dry, dust-free areas, as moisture and dust will reduce their effectiveness.

It is advisable to contact a professional exterminator to deal with more severe infestations, since rodents reproduce constantly and quickly.

In summary, rodent infestation poses a serious risk to human health, and extreme caution must be taken when eliminating the problem.  This article is from InterNACHI and can be found at https://www.nachi.org/rodent-inspection.htm.

Schedule your home inspection with Red Horse Home Inspection of the Black Hills.  Follow us on Facebook and Instagram.

by Nick Gromicko, CMI®

Galvanic corrosion (also known as bimetallic corrosion or dissimilar-metal corrosion) is an electrochemical disintegration that occurs when dissimilar metals come in contact with each other while immersed in an electrolyte. Galvanic corrosion is of major concern anywhere moisture can reach metal building components. Corrosion asGalvanic Corrosion from home inspection in rapid city sd a broader category is defined as the disintegration of a material into its constituent parts, which may be caused by crevice corrosion, microbial corrosion, and high-temperature corrosion.

There are three conditions that must exist for galvanic corrosion to occur:

  • Two electrochemically dissimilar metals must contact one another. They are dissimilar in the sense that they are far apart on the anodic index, which rates metals based on their electrode potentials. Metals that are more active (such as magnesium and zinc) will corrode in the presence of metals that are less active (such as gold and platinum).
  • There must be an electrically conductive path between the two metals. Any non-metal, liquid substance that can conduct an electric current (such as saltwater or rainwater) can function as an electrolyte. Common examples are ordinary seawater, citric acid, and bases.
  • An electrical path must exist to allow metal ions to move from the active metal to the less active metal. Typically, the metals merely touch one another.

The Statue of Liberty is perhaps the most famous case of galvanic corrosion. Contact between the wrought-iron support and the outer copper skin amidst rainwater exposure has allowed the structure to gradually corrode. The famous icon’s builder anticipated this problem and installed asbestos cloth soaked in shellac insulation in the 1880s.  This worked for some time until it dried up and became porous, acting as a sponge that held saltwater close to the contact points between the two metals. An inspection in 1981 revealed severe galvanic corrosion of the iron supports, causing them to swell and push saddle rivets through the copper skin. This rapidly worsening situation was the main drive to restore the statue in 1986, when the iron was replaced with a variety of corrosion-resistant steel. The solution has held up, and native New Yorkers and visitors alike have been able to enjoy a landmark free from corrosion that will last long into the 21st century.

Examples in Houses

  • ACQ (alkaline copper quaternary) lumber includes copper, which can corrode when it comes in contact with common aluminum building nails. With this type of lumber, it’s best to use G185 galvanized steel or stainless steel fasteners, as they will resist corrosion.
  • Aluminum wiring can become compromised. In the presence of moisture, aluminum will undergo galvanic corrosion when it comes into contact with certain dissimilar metals.
  • Piping commonly rusts and corrodes, especially at joints. The failure of pipe thread is commonly caused by corrosion where carbon steel pipe directly meets a brass valve, or where it transitions to copper pipe. Dielectric unions may be installed to separate these metals to resist damaging corrosion in pipe connections.
  • The elements of an electric water heater often rust and fail. The copper sheathe and steel base, if they become wet, may corrode. Installing galvanized unions with plastic nipples on the top of the water heater can prevent corrosion.

Galvanic Corrosion Can be Prevented in the Following Ways

  • Electrically insulate the dissimilar metals. Plastic can be used to separate steel water pipes from copper-based fittings.  A coat of grease can be used to insulate steel and aluminum parts.
  • Shield the metal from ionic compounds. This is often accomplished by encasing the metal in epoxy or plastic, or painting it. Coating or protection should be applied to the more noble of the two metals, if it is impossible to coat both. Otherwise, greatly accelerated corrosion may occur at points of imperfection in the less noble (more active or anodic) metal.
  • Choose metals that have similar potentials. Closely matched metals have less potential difference and, hence, less galvanic current. The best such solution is to build with only one type of metal.
  • Electroplate the metals.
  • Avoid threaded connections, as they are most severely weakened by galvanic corrosion.
In summary, galvanic corrosion is the disintegration of metals in the presence of an electrolyte. It can occur in homes wherever dissimilar, joined metals become damp.  This article is from InterNACHI and can be found at  https://www.nachi.org/galvanic-corrosion.htm.

by Nick Gromicko, CMI®

Water Damage Concerns

Basements are typically the area of a structure most at risk for water damage because they are located below grade and surrounded by soil.  Soil releases water it has absorbed during rain or when snow melts, and the water can end up in the basement through leaks or cracks.  moisture issue cause mold found during a home inspection near rapid city sdWater can even migrate through solid concrete walls via capillary action, which is a phenomenon whereby liquid spontaneously rises in a narrow space, such as a thin tube, or via porous materials.  Wet basements can cause problems that include peeling paint, toxic mold contamination, building rot, foundation collapse, and termite damage.  Even interior air quality can be affected if naturally occurring gasses released by the soil are being transmitted into the basement.

Properly waterproofing a basement will lessen the risk of damage caused by moisture or water.  Homeowners will want to be aware of what they can do to keep their basements dry and safe from damage.  Inspectors can also benefit from being aware of these basic strategies for preventing leaks and floods.

Prevent water entry by diverting it away from the foundation.

Preventing water from entering the basement by ensuring it is diverted away from the foundation is of primary concern.  Poor roof drainage and surface runoff due to gutter defects and improper site grading may be the most common causes of wet basements.  Addressing these issues will go a long way toward ensuring that water does not penetrate the basement.
Here are some measures to divert water away from the foundation:
  • Install and maintain gutters and downspouts so that they route all rainwater and snow melt far enough away from the foundation of the building to ensure that pooling does not occur near the walls of the structure.  At least 10 feet from the building is best, and at the point where water leaves the downspout, it should be able to flow freely away from the foundation instead of back toward it, and should not be collecting in pools.
  • The finish grade should be sloped away from the building for 10 to 15 feet.  Low spots that may lead to water pooling should be evened out to prevent the possibility of standing water near the foundation.
  • Shallow ditches called swales should be used in conditions where one or more sides of the building face an upward slope.  A swale should slope away from the building for 10 to 15 feet, at which point it can empty into another swale that directs water around to the downhill-side of the building, leading it away from the foundation.


Repair all cracks and holes.
If leaks or seepage is occurring in the basement’s interior, water and moisture are most likely entering through small cracks or holes.  The cracks or holes could be the result of several things.  Poor workmanship during the original build may be making itself apparent in the form of cracks or holes.  Water pressure from the outside may be building up, forcing water through walls.  The house may have settled, causing cracks in the floor or walls.  Repairing all cracks and small holes will help prevent leaks and floods.
Here are some steps to take if you suspect that water is entering the basement through cracks or holes:
  • Identify areas where water may be entering through cracks or holes by checking for moisture, leaking or discoloration.  Every square inch of the basement should be examined, especially in cases where leaking or flooding has not been obvious, but moisture buildup is readily apparent.
  • A mixture of epoxy and latex cement can be used to fill small hairline cracks and holes.  This is a waterproof formula that can help ensure that moisture and water do not penetrate basement walls.  It is effective primarily for very small cracks and holes.
  • Any cracks larger than about 1/8-inch should be filled with mortar made from one part cement and two parts fine sand, with just enough water to make a fairly stiff mortar. sign to look for during a home inspection It should be pressed firmly into all parts of the larger cracks and holes to be sure that no air bubbles or pockets remain.  As long as water is not being forced through basement walls due to outside pressure, the application of mortar with a standard trowel will be sufficient if special care is taken to fill all cracks completely.
  • If water is being forced through by outside pressure, a slightly different method of patching with mortar can be used.  Surface areas of walls or floors with cracks should first be chiseled out a bit at the mouth of the crack and all along its length.  Using a chipping chisel and hammer or a cold chisel, cut a dovetail groove along the mouth of each crack to be filled, and then apply the mortar thoroughly.  The dovetail groove, once filled, should be strong enough to resist the force of pressure that was pushing water through the crack.

Apply sodium-silicate sealant to the walls and floor.

Once all runoff has been thoroughly diverted away from the foundation, and all cracks and holes have been repaired and no leaking is occurring, a waterproof sealant can be applied as a final measure.

Sodium silicate is a water-based mixture that will actually penetrate the substrate by up to 4 inches.  Concrete, concrete block and masonry have lime as a natural component of their composition, which reacts with the sodium silicate to produce a solid, crystalline structure which fills in all the microscopic cracks, holes and pores of the substrate.  No water vapor or gas will be able penetrate via capillary action because the concrete and masonry have now become harder and denser from the sodium silicate.
Here are some steps and tips for its application:
  • Special care should be taken when applying sodium silicate.  It is an alkaline substance and, as such, can burn skin and eyes if it comes into contact with them.  Inhalation can also cause irritation to the respiratory tract.
  • Sodium silicate must be applied only to bare concrete, concrete block or masonry that has been cleaned thoroughly and is free of any dirt, oil, adhesives, paint and grease.  This will ensure that it penetrates the substrate properly and fills in all microscopic cracks.  It can be applied using a garden sprayer, roller or brush to a surface that has first been lightly dampened with a mop or brush.  Apply two to three coats to the concrete, waiting 10 to 20 minutes between each application.  Concrete block and masonry will take three to four coats, with the same 10 to 20 minutes between applications.  Any excess should then be wiped away.  Sodium silicate should not be over-applied or it will not be completely absorbed by the substrate, leaving a white residue.
  • Paint can then be applied without fear of water vapor getting trapped between the paint and the wall, which could eventually cause blistering and peeling.  Adhesives for tile or floor covering can also be used more effectively, once the substrate has been sealed.
Diverting water away from foundations so that it does not collect outside basement walls and floors is a key element in preventing flooding and water damage.  Ensuring that any water that does end up near basement exteriors cannot enter through holes or cracks is also important, and sealing with a waterproof compound will help prevent water vapor or gas from penetrating, as well.  By following these procedures, the risk of water-related issues in basement interiors can be greatly reduced, protecting the building from damage such as foundation rotting, mold growth, and peeling paint, as well as improving the interior air quality by blocking the transmission of gasses from the soil outside.  This article is from InterNACHI and can be found at https://www.nachi.org/waterproofing-basements.htm.